I’ve been playing with 360° images for years. They have proven useful for showing places I have visited without having to display a dozen individual pictures and when shot as video, you in effect have access to a scene being shot by an unlimited number of cameras.
I have had the opportunity to play with a program called Panovolo the last few days, and this has opened my eyes to wider uses of 360° imagery, whereas in the past it has been mostly used as a sort of gimmick I suppose you could say.
Range of Options

What makes Panovolo different to previous programs I have used is the range of options inside the program to render the finished image.
The process to that point is straight forward; shoot a series of still images to capture the range of the horizon you want – it doesn’t have to be 360° ie a complete circle, it could easily be 180° for example. Just take the photos you want allowing a bit of overlap between successive frames.
Panovolo was designed particularly with images from drones being used to create the panoramas in the projection you want, but any sequence of images can be used and recently the program was updated to allow direct import from DJI 360 II and DJI AVATA 360 cameras / drones.
Ideally, save these images to a folder on your computer – make sure they are the only files in that folder – and then start the Panovolo program. You can if you wish import to the program directly from the camera and then tell Panovolo where to save locally.
It’s important to know that everything stays local – there is no cloud usage or anything of that nature involved when using Panovolo.
At its most basic, you select the folder containing the images and Panovolo will stitch together a panorama image of those images. The time taken depends on the “grunt” of your computer / video card / GPU combination. The one you see here which is a full 360° image of Walyup point in Bunbury Western Australia took around 90 seconds.
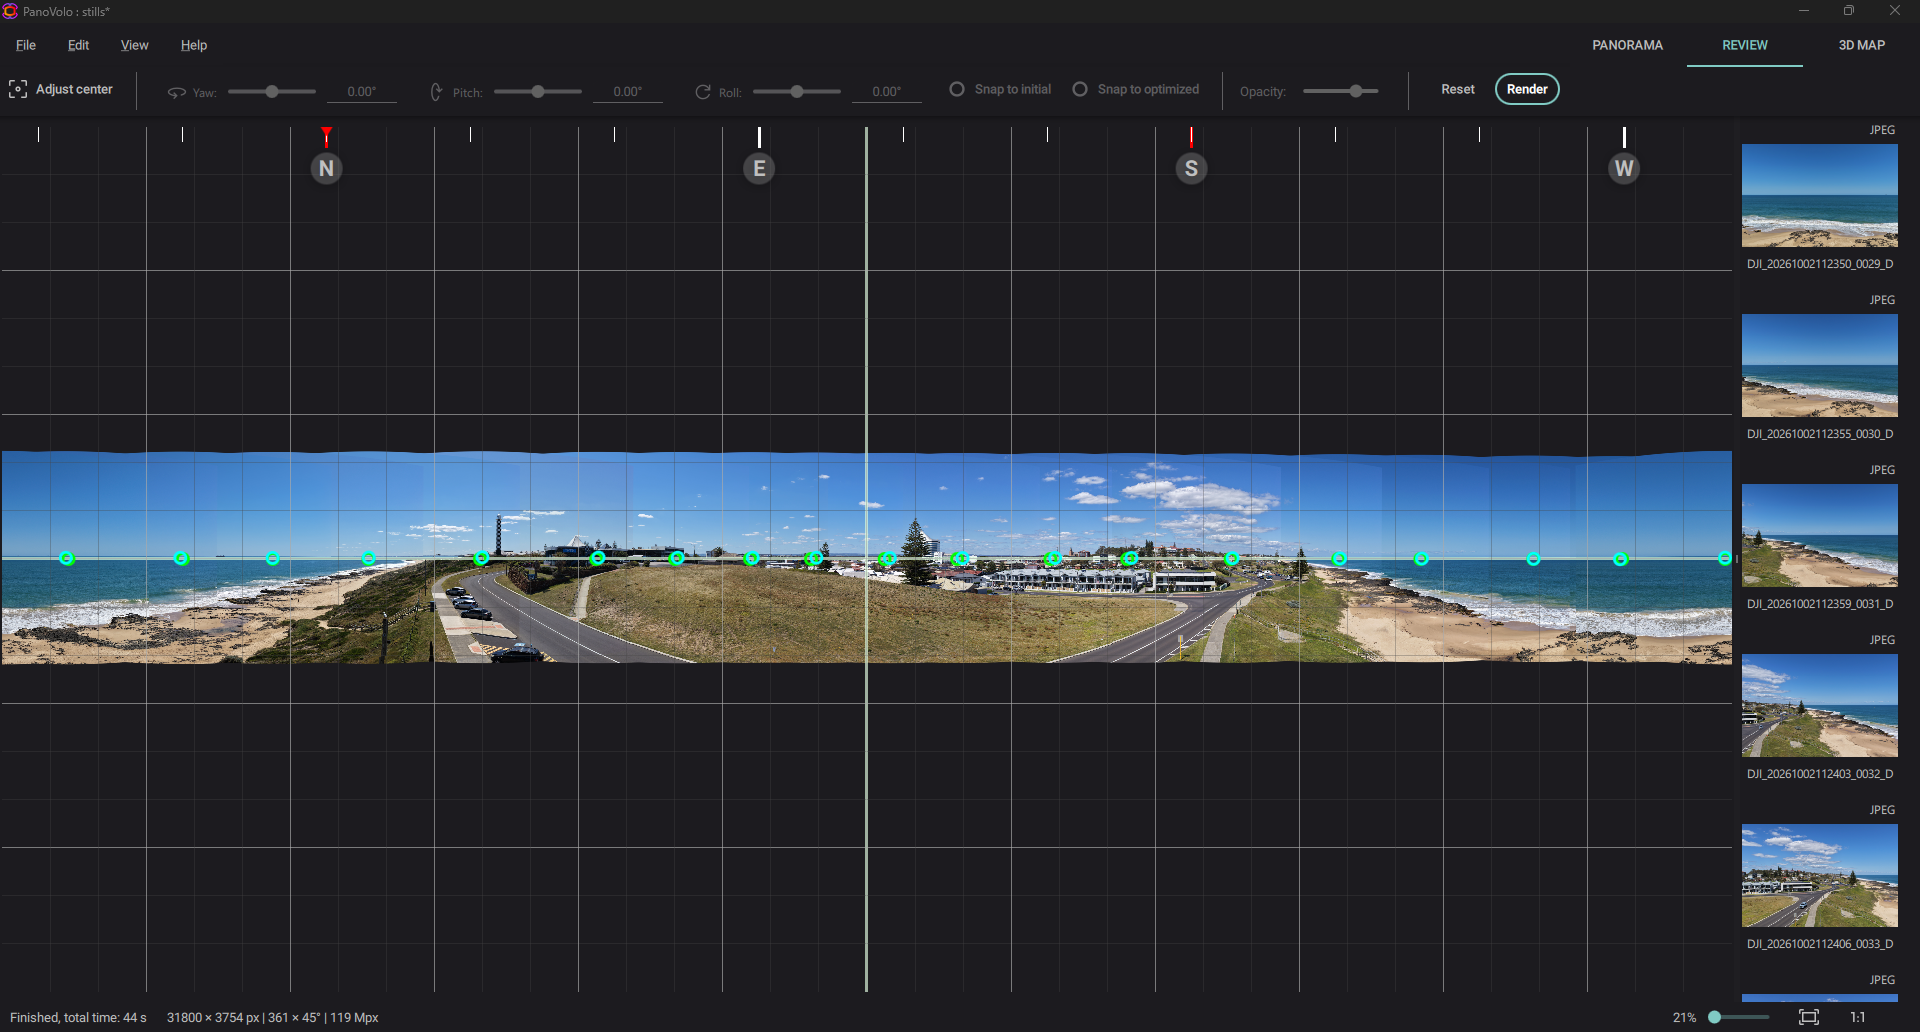
Now this is where the fun starts. The default is a 360° panorama image and this will of course cause distortions with a circular image being mapped onto a flat surface. If you switch into the Review mode, you can see where the images are stitched and make any corrections using CTRL Drag or SHFT Drag on the blue points. Other options include changing the Yaw, Pitch and Roll degree amounts as well as access to snapping options and opacity.

Finally, you can SHFT or CTRL Drag the viewing centre pont of the image to a new location and re-render.
There are more generic options available under the Edit Menu such as Horizon Straighten, Fill Sky and Auto Crop and the Settings option is used to define the type of image (JPEG, DNG or TIFF), the quality and size in pixels.
Different Types of Projection
But here you can also change the type of panorama rendering you want. Depending on your needs, you can select either the default (Spherical 360°), Cylindrical, Mercator, Panini, Rectilinear or Stereographic 360° .
Cylinder mode is pretty self explanatory but some of the others may need an explanation.
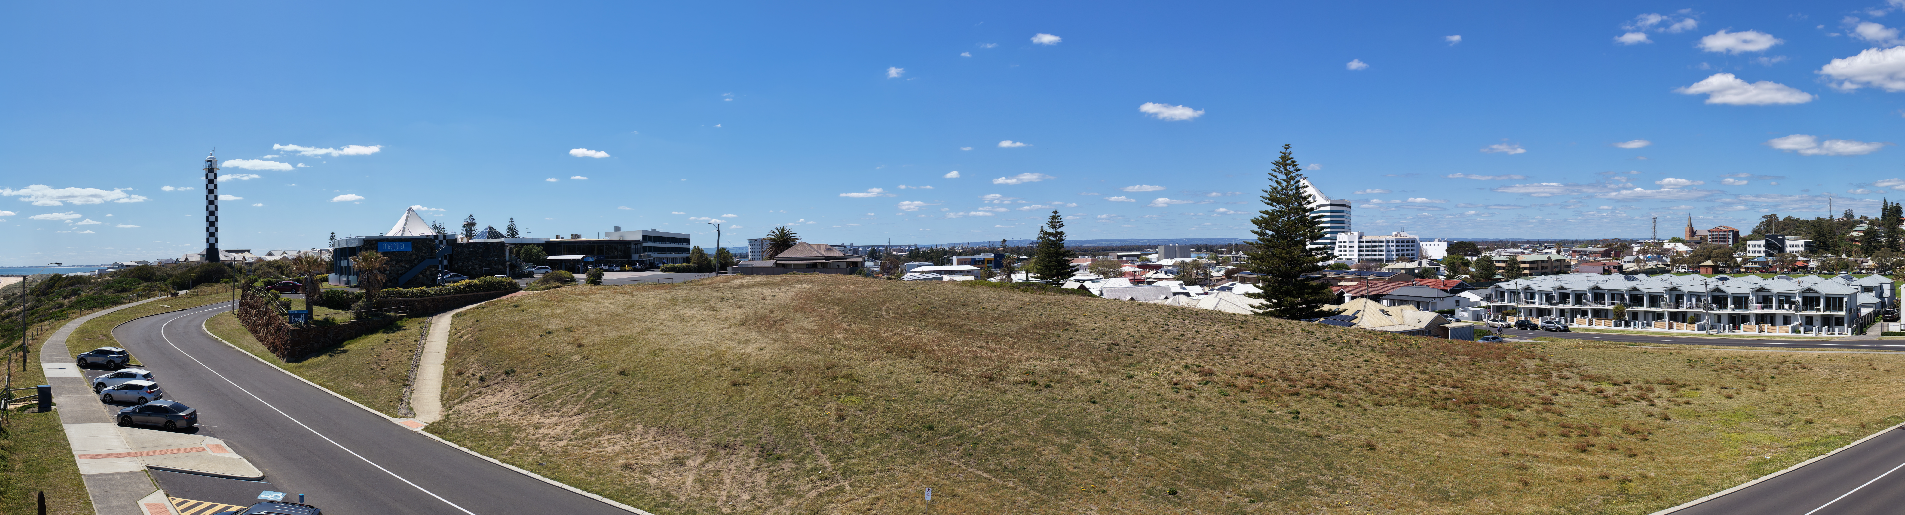
Mercator projection is the type commonly used to display a map of the world. Its drawback is that to make a sphere appear on a flat surface, heavy distortion comes into play where for example, the country Greenland looks much, much larger than it really is, distances between two points show exaggerations and visual errors depending where they are in the image.
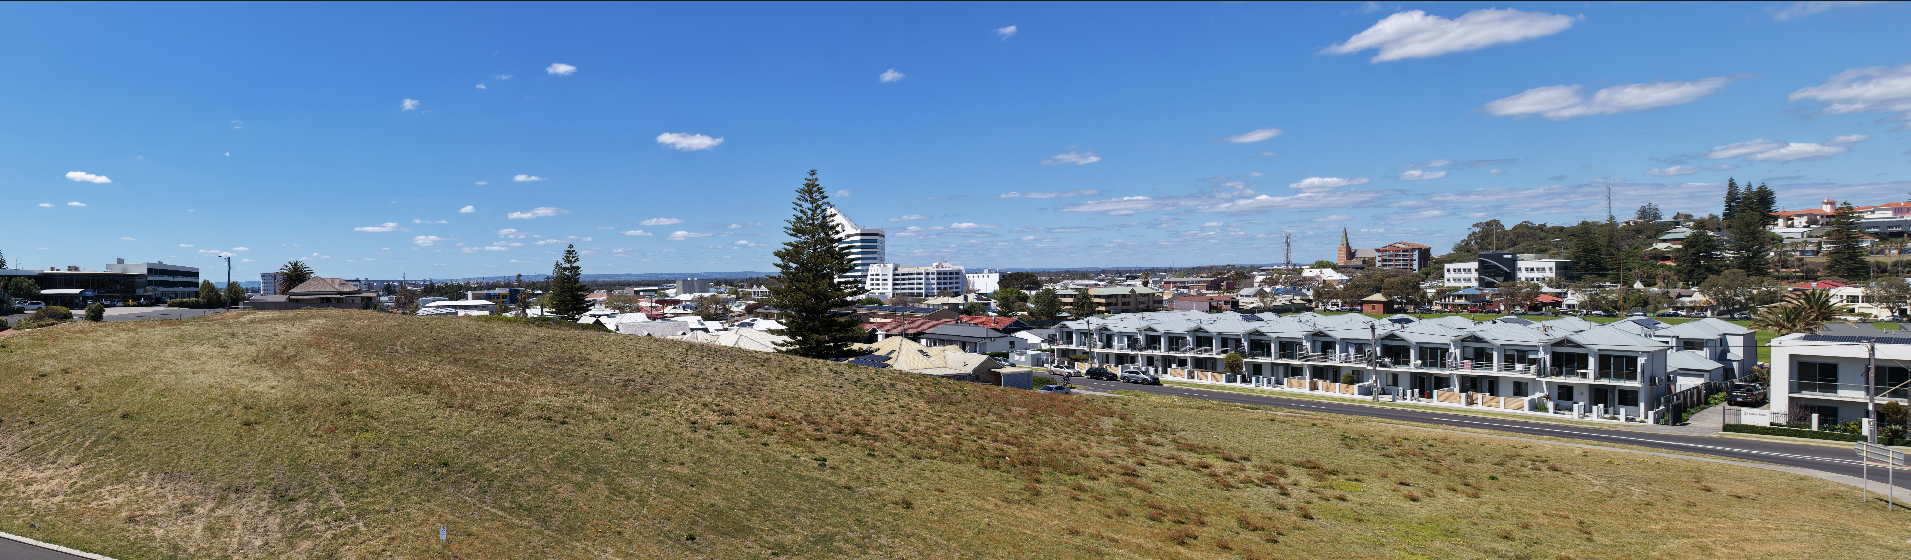
Panini is named after an Italian artist who painted landscapes and used this method. Vertical lines stay vertical, so buildings and doorways don’t lean and lines running toward the viewer converge, as in a normal perspective photo. The final result looks like “what you’d see” more closely than a straight rectilinear projection at wide angles, where edge objects are heavily stretched and smeared.
Rectilinear is useful for bringing images into programs such as DaVinci Resolve for inclusion in video. A plugin allows the distortions to be corrected, and key frames used to extract parts of the image as required.
Finally stereographic projection maps the whole 360° sphere onto a flat circle, which produces the “tiny planet” look (or a “rabbit hole” look if you flip it). It’s conformal, meaning it preserves local shapes and angles, so small objects don’t look warped even though the overall picture is dramatically curved.
In any projection, using the middle mouse button you can zoom into images in various percentages with no discernible loss of detail if shot in 4K I find.
3D Map
A final view and only recently added to Panovolo is 3D Map view. This uses the coordinates of the images you have taken using its metadata and projects them onto Google Earth giving you a “bird’s eye” view of the scene.
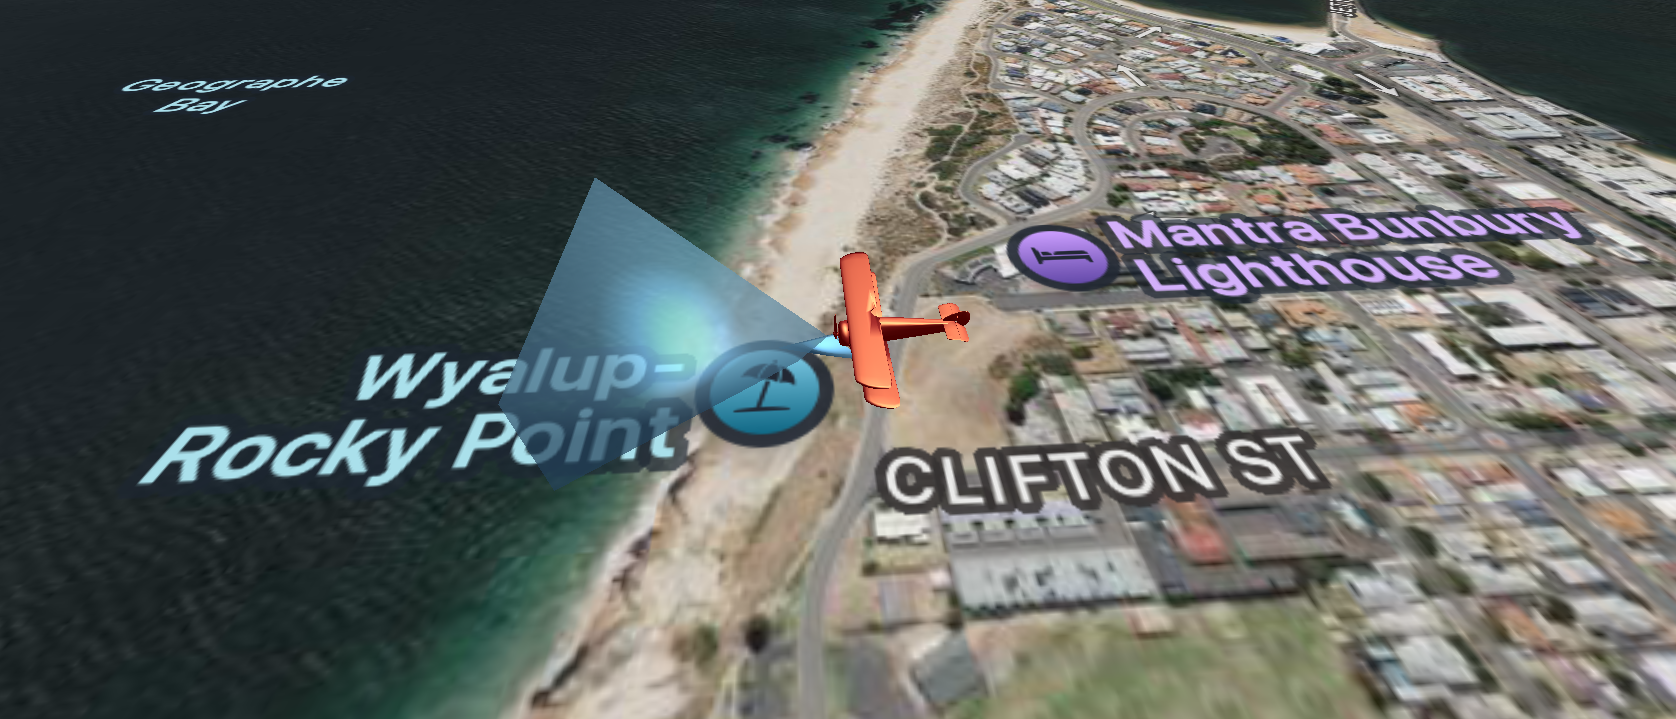
This can be zoomed, panned and tilted as needed.
Usage
Apart from simply making a good looking photo that lends itself to large scale printing and framing, there are many real-world uses for these completed shots.
In certain industries such as landscaping, architecture and so on, it is often advantageous to be able to give a client a quick overview of an entire space in one single image. Other options include comparing the same location over time and having a panorama can save lots of time waste comparing multiple images.
There are also many uses in 3D creation and virtual productions for creating backdrops, in game production and input for AI and computer vision tools for mapping and photogrammetry.
Conclusion
Panovolo is an effective tool with a multitude of uses in various industries and disciplines. It is easy to use and inexpensive but produces excellent results that can be tweaked and modified as necessary.
For larger jobs a batch mode is available and completed files told to be saved to a specific folder or location.
A trial version is available for both Mac and PC, and unlike many applications these days, the licencing is perpetual with no subscriptions. A full licence only costs $39.99 and all updates for the version you purchase are free.