
My ongoing journey with the DJI Pocket 4P has led me down some interesting paths.
There are a number of areas of video I admit I have had little contact with, and a good example is the combination of shooting in what are called Log formats and the allied magic / science of colour grading.
If you are in the same boat as me and know that your camera or drone (or smartphone with Blackmagic Camera installed) has these Log modes, but no idea what they are or mean, let me fill you in what I have learnt as it may help – and open up a whole new world in the process as it happens.
If you are a seasoned colour grader or have been shooting and editing with Log formats, then you may as well stop reading right here as you know this stuff already!
First, you need to understand what the term “colour space” means.
Colour Space
Colour space is basically a defined system for describing colours as numbers — a way to say exactly which “red” or “blue” you mean, out of every colour that’s possible to represent.
Think of it as a coordinate system for colour. Just like GPS coordinates pin down an exact location on Earth, a colour space defines a specific range (or “gamut”) of colours, plus a mathematical model for describing where any given colour sits within that range using numeric values (like RGB values).
There are different colour spaces in use by different manufacturers as well as a sort of standard everyone accepts known as Rec.709 (no I don’t know why it’s called that either, but I’ll find out).
Rec.709 and Other Things
Rec.709 is accepted as the standard range for such things as HD broadcasts, used by monitors and smartphones for example.
By contrast, your drone may be able to capture in D-Gamut/D-Log M which is a way of encoding brightness/dynamic range flatly so more detail is preserved before you convert into a proper colour space for viewing. Similarly, Sony gas S-Log2, Canon has Canon Log 2 and Panasonic, GoPro, Nikon and Apple all have their own amongst others.
The trick therefore is when editing your footage, to convert it from one used by the camera to the Rec.709 that a monitor or TV set is expecting.
So, why do companies like DJI, Sony, GoPro etc use something other than Rec.709?
The answer is straightforward and lies in the fact they want to capture as much detail as possible when you are shooting based on their specific technology, and this later lets you “play around” with that footage to make it as good as possible, fine tuning things like contrast, brightness and luma in post production.
And this is called colour grading.
It also means you can again, fine tune footage so different takes from different cameras can be all made to look the same.
OK, now knowing all that, I decided to0 have a quick play with the DJI Pocket 4P and shoot some D-Log footage and see what it looked like compared to the default Rec.709. But then the question arises as to how do you convert from one to the other so you can play it back?
DaVinci Resolve
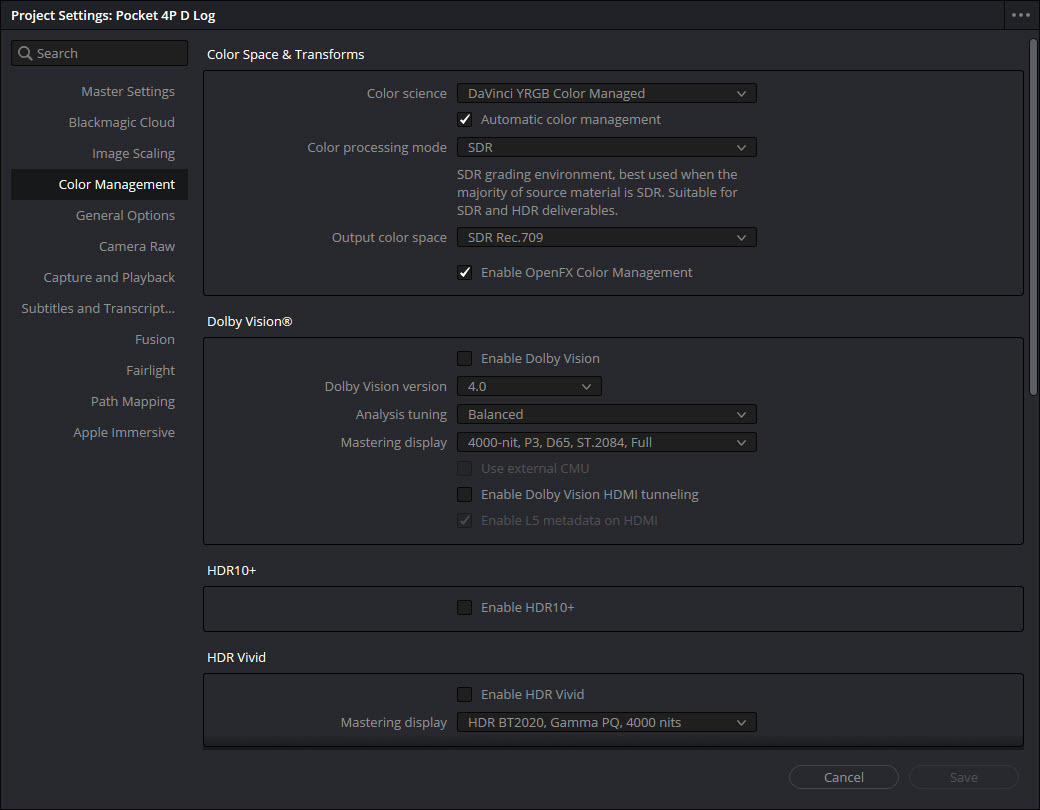
This is where DaVinci Resolve comes in. It is almost universally recognised as THE colour grading tool to use, and a vast majority of your favourite movies and TV shows have probably been graded on it.
So, I bit the bullet and waded through a pile of YouTube videos on using DaVinci Resolve on how to colour grade.
At this point I have to say a lot of it was way over my head. I don’t want to be a colourist, I just want my footage to look better, so getting into the realms of nodes and all that Colour Page stuff was way beyond what I wanted to learn.
Then I came across a video that proudly called itself “No NODES, No CST, No COLOUR Page! EDITORS Colour Management”. You can access it here.
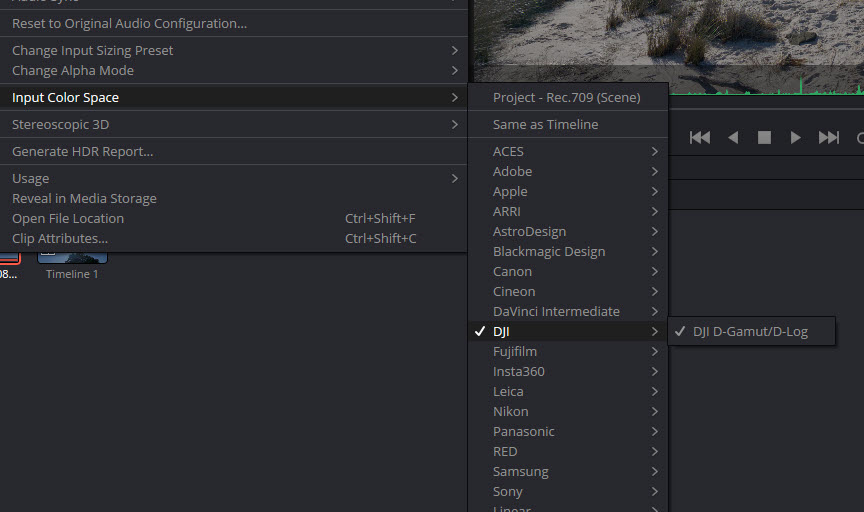
And it all made sense and was so easy. Basically, you can tell Resolve what the source colour grade is, what you want the destination to be, and then tweak all the settings to your heart’s content in the Edit page.
If you have multiple cameras in use so have multiple colour spaces, there is even a way of solving that problem by applying different colour space definitions using the Media Pool and DaVinci Resolve’s Colour Management System that has presets for most Log formats..
And yep. You can make your footage look WAY better than you might have thought and is why I am switching all my cameras and drones to now shoot in their native Log format.
Of course, other editing packages such as Adobe Premiere, Final Cut Pro and Vegas Pro also have much the same sort of facility just so you know.
Footnote: “Rec.709” is short for ITU-R Recommendation BT.709 — a technical standard published by the ITU (International Telecommunication Union), specifically its Radiocommunication Sector (ITU-R).
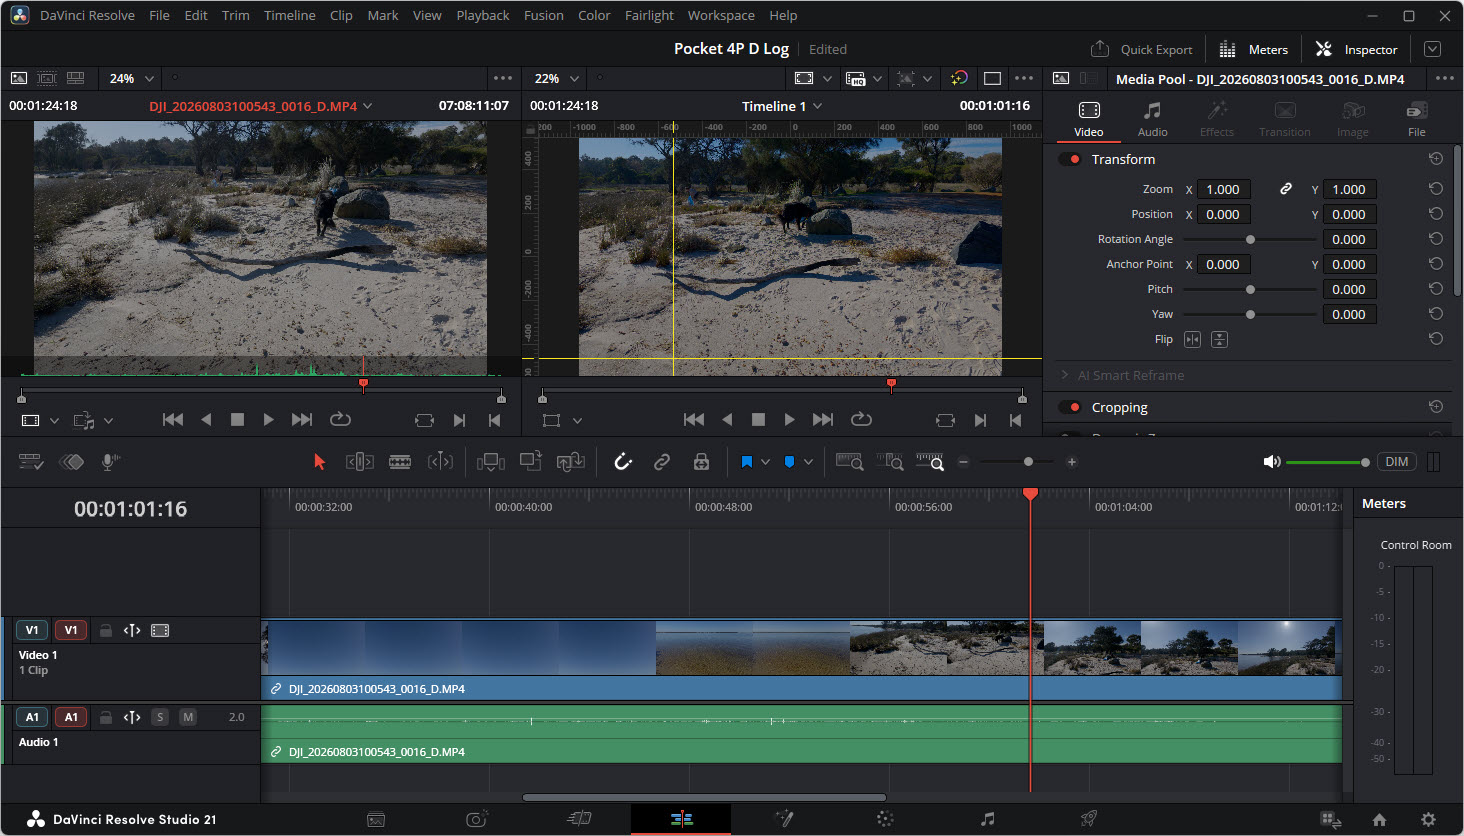
The image at right shows the file straight from the camera shot in DJI’s Log Format and the images above are after applying the basic grading in DaVinci Resolve.
The original image looks ‘orrible as it is raw data with no or little colour information yet applied although that information / data IS contained in the image.
One Comment
[…] short, I can easily charge my phone as well as say, my DJI Pocket 4P, the DJI Mini 2S Mic AND a battery for a DJI Flip drone all at the same […]