Welcome to my 2nd tutorial on using DaVinci Resolve. The aim of these tutorials is not to turn you into a Steven Spielberg or George Lucas, but instead to get beginners used to the basics of editing footage you may have taken on your GoPro or DJI drone. You can get DaVinci Resolve for free from Blackmagic Design by clicking here.
If you missed Part 1, you can see it here.
My thinking is you don’t want to be a fully fledged paid up video editor, but you DO want to make good looking videos out of your material.
You can read the first of these which is an introduction to the basics of the workflow of editing here. This second tutorial goes to the next stage of actually cutting up your footage, adding titles, transitions, fades and a lower 3rd.
And do please let me know what you think in the comments below. They are all anonymous. You might also like to sign up for my weekly e-Magazine sent out to all subscribers. That is also free and all you have to do is enter your email address into the popup on this page (or email me at david@auscamonline.com).
Editing Basics – DaVinci Resolve (Part 2)
Now you have an overview of the editing process from Part 1, let’s put together a very simple project from scratch.
For the purpose I am going to use a single clip shot with my DJI Air2S at Whalebone Beach in the northwest of Western Australia near the tourist spot of Monkey Mia, famous worldwide for its dolphins.
Once we have the clip cut the way we want it, we’ll then add some transitions, a title graphic and a lower third overlay image. Finally we’ll render it out for distribution.
This is a frame from the final result.

As per Part 1, I’ll be using Blackmagic Design DaVinci Resolve for this project. This editor, which whilst easy to learn the basics, is very powerful in its capabilities. Better yet, its free and available for Windows, iOS and LINUX. You can get it here.
With the latest version of DaVinci Resolve, you have the option of working in full editor mode or alternatively, in a special mode called ‘the Cut Page’. In this tutorial we’ll be using the full editor mode.
Start by launching DaVinci Resolve. Along the bottom of the main window, you’ll see a row of icons. The one to click to use the Editor mode is the third from the left.
![]()
Click this and you’ll enter the Full Editor mode (Resolve may open at this automatically). The other icons are used for other functions within Resolve such as audio editing, colour correction and media management.
 You’ll notice on the left there is a gray message saying there are no clips in the media pool. To load the clip we want to work with, click File and then Import and select Media from the flyout menu. You can now navigate to the location of your video file to be used in this project and load it into the Media Pool.

At this point, you may get a message asking to Change Project Frame Rate. There are times when you won’t want to for various reasons, but for now just click Change.
Editing Clips
We now want to go through this clip and select the portions we want in the final output. To this, double click the clip and it will load into the editing window.

The next step is to mark the in and out points of the segments of this clip and add them one by one to the timeline. The timeline is the area underneath the editing window where the clips will be assembled on a track. More complex projects will usually involve a number of tracks, sometimes dozens, there are separate track types for video, audio, titles, effects and so on.
To mark the first segment you wish to add, play the clip and when you find what looks like a good starting point, press ‘I’ on your keyboard to mark the “in” point of that segment. You can start and stop the playback with the on-screen buttons, or alternatively use the space bar.
Once you have an In point marked start playing the clip again to find the end of the segment you want on the timeline and press “O” key to mark the Outpoint.
Your editing window should show the two points.

To add this segment to your timeline, simply press the F12 key. This key is the Append command and will add the clip to the end of any other clips on the timeline. As this is the first, it will simply place it at the beginning.
Of course, there are other ways of adding clips to specific parts of the timeline such as between two clips, to fit a specific amount of time on the timeline, fit to fill and more. These options will be covered in a later tutorial.
Once you have pressed F12, the clip will appear on a track in the timeline. You’ll also notice there is now an extra item in the Media Poll, that of the Timeline. Resolve allows you to create timelines and then assemble them together. This is very useful when you have a complex project and want to break it up into manageable chunks.

The editing window has now changed and is instead showing the contents of the timeline.
To select the In and Out points of your next segment, double clip the original clip in the Media Pool again. You can see the In and Out points of the first segment are still there. You can scroll through the clip and mark another In and Out point and Append this in exactly the way did the first segment.

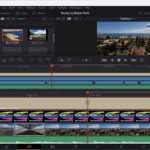
This image shows three clips have been marked and Appended to the timeline. If you press the Home key, the cursor on the timeline will move to the start of the video. You can now press the Space bar to play through it to the end.
When you have finished, press Home again to go back to the start.
Transitions
You’ll have noticed when the timeline switches from one clip to the next, the transition between the two is immediate. This is called a Straight Cut. You can add different ways for this transition to occur.

To the left of the Timeline you should see a window marked Toolbox and inside the Toolbox is an entry called Video Transitions. Clicking this will then open all the transition types available to you.
The most common to use after a straight cut is a Cross Dissolve. If you click on this and drag it on the line between two clips you should see a small white rectangle appear between those two clips. I have expanded the timeline here so you can see it better (expanding or shrinking the timeline is done by holding the ALT key and using the scroll wheel on your mouse).
If you now play the timeline, you’ll see between those two clips we now have a cross dissolve.
Now look at the panel in the top right. This is called the Inspector and contains all the parameters for objects in the Timeline. If you click the Transition tab, making sure the transition is still highlighted in the timeline, all the parameters for your transition can be seen. To change one, simply change the current value.
For example, if you change the Duration from 1 to 3 seconds, it will take longer for the cross dissolve to occur between the two clips. This will also show by the transition box in the timeline getting bigger.
There are many parameters you can change and the best way to learn what they can do is simply experiment. Just about any object you may place on the timeline will have these parameters by the way such as clips themselves, titles, audio and so on.
If you change a parameter but don’t like the result, simply put it back to its original value or Press CTRL+Z to undo it.

To add exactly the same transition to the next clip, select the first, Press CTRL+V to copy it, hover the mouse pointer over the next transition, right click and choose Paste from the menu.
Adding Titles
In DaVinci Resolve there are many types of titles from static ones like we’ll be doing in a second to complex ones like you see at the end of movies.
For this tutorial I am simply going to add a text overlay that describes the location of this video and place it in the top left of the screen.
If you look back on the Toolbox, underneath the Video Transitions entry there is one marked Titles. Click this, and similar to the list of available Video Transitions, you’ll see a list of Title types available to you.

We are going to use the one called Text.
Make sure your timeline cursor is at the start of the timeline by pressing Home or dragging it there with the mouse (you need to drag the cursor in the Time Ruler above the clip tracks in the timeline).
Next, click and drag the Text heading in the Toolbox ABOVE the track holding the clips you have edited. Resolve will automatically create a new track and place the title clip on it and you will see this in the editing window in the dead centre of the screen with the words Basic Title.

To change its content, if you look in the Inspector, you can see you have a text box where can change the text plus many other parameters such as font style, size, colour, location and much more.

In this shot you can see how I have modified the text, changed the font and size and added a shadow. Note that you can select just parts of the text and change those parameters. Here for example, the top line is in Impact 96 font / size and the next line is Impact 48.
Another parameter you can change is the position of the text. At present it is at X 960 and Y 540. By changing those values you can place the text anywhere on screen as you can see.

(Quick Tip: By placing the mouse pointer over a value in the Inspector, holding down the right mouse button and dragging left or right will change the values and you can see the titles in this case move as you change those numbers. Alternatively, you can of course just type the new values into the boxes).
Right. The only thing left to do with our title is drag the right edge of the clip on the timeline to match the length of the clips in the track below.

(Quick Tip: if you don’t want the title to last the whole clip, but gradually fade out, if you hover the mouse over the top right corner of the title clip you’ll see white dot appear. Drag this to the left and you’ll create a fade out like you see here. You can do this to just about any clip type)

Lower 3rd
A lower 3rd is a graphic element that displays across the bottom of the screen They are very common in news items and documentaries and used to pass on further information about the clip. This might be the name of the person speaking, a location, news flash or in the case of the one I am about to add, a company logo, company name and website.
I created this lower third graphic in Adobe Photoshop, but any graphics package that allows you to add transparency should be suitable. If you want to know the technique for creating this transparency, shoot me a quick email at david@auscamonline.com
First, I need to add the lower 3rd graphic to the Media Poll. Make sure the timeline cursor is at the beginning of the timeline. Adding the image file is done in exactly the same way we did with our video clip. Click File -> Import Media and navigate to the file to load it.

Next, click the file and drag it ABOVE the title track we added earlier. As soon as you release the mouse button, Resolve will create a new track to contain the lower 3rd graphic and you’ll see it appear in the editing window.
All you need to do now is drag the right edge of the clip to the place where you want the lower 3rd to finish. Here I have dragged it to make it the same length of the video clip duration. That is, it will stay on the screen from the start of the video until the very end.

Of course you can select the lower 3rd clip and investigate changes its parameters in the Inspector if you wish.
Deliver
Now that we have added clips, titles and a lower 3rd, the final step is to render the video out to a single file so that it can be distributed. This could be via a USB stick, SD card, on a portable hard disk or posting it to YouTube, Facebook, Twitter or Instagram for example.
Each of these mediums require different parameters and DaVinci Resolve makes it easy for some of them by having presets you can use. For now, we’ll just create a simple MP4 file that you could manually post to say Facebook or YouTube.
If you look at the bottom of the DaVinci Resolve window (where at the start you selected the Edit mode), the last option is Deliver. If you click this, Resolve will switch into the mode where we can render our clip.

At left are the parameters we can set for the final output such as format, codec, resolution and so on. The only one we need to change is the format. Click the drop down and change it to MP4. At the top, add a filename and choose a location on your hard drive to save the completed clip.
At the bottom of this panel is a button labelled Add to render Queue. Click this and Resolve will add this project to a queue ready for rendering. You’ll see the queue at the top right. You can render it now by clicking the Render All button or wait until later after you may have created some more projects.
If you click Render All now, Resolve will render the file. Depending on the size, length, amount of complexity (effects, transitions, audio, music etc) this can take from minutes to hours. Your computer’s specifications also have a huge bearing on this.
Conclusion
Congratulations! You have successfully edited, added titles and a lower 3rd to your video. Of course there is a lot more functionality in DaVinci Resolve and here we have just scratched the basics.
I urge you to go and download the full PDF manual and by all means, just have a play. DaVinci Resolve is a non-destructive editor so your original clips will always be intact as long as you don’t delete them.
