Reading through the post on various forums it is quite evident that a lot of people are not aware of the basics of video and photography, and as a result, are not getting the very best results from their cameras – whether it be a GoPro, smartphone, drone, mirrorless or dedicated videocamera.
At this stage, I’ll only aim at the GoPro user as this seems to be the biggest cohort of people with issues.
What’s it all about?
Photography (and videography) are all about light. Without it, you have nothing. So, the very first thing you need to understand is that to get the best results for your efforts, make sure there is enough light for the camera sensor to do its thing.
Note here that GoPro’s are notoriously bad in low light; this is mostly a function of the sensor by the way. The smaller the sensor in a camera, the less light it can capture. This is why so much is made by camera manufacturers of sensor size, (and why a smartphone will never be as good as a dedicated camera).
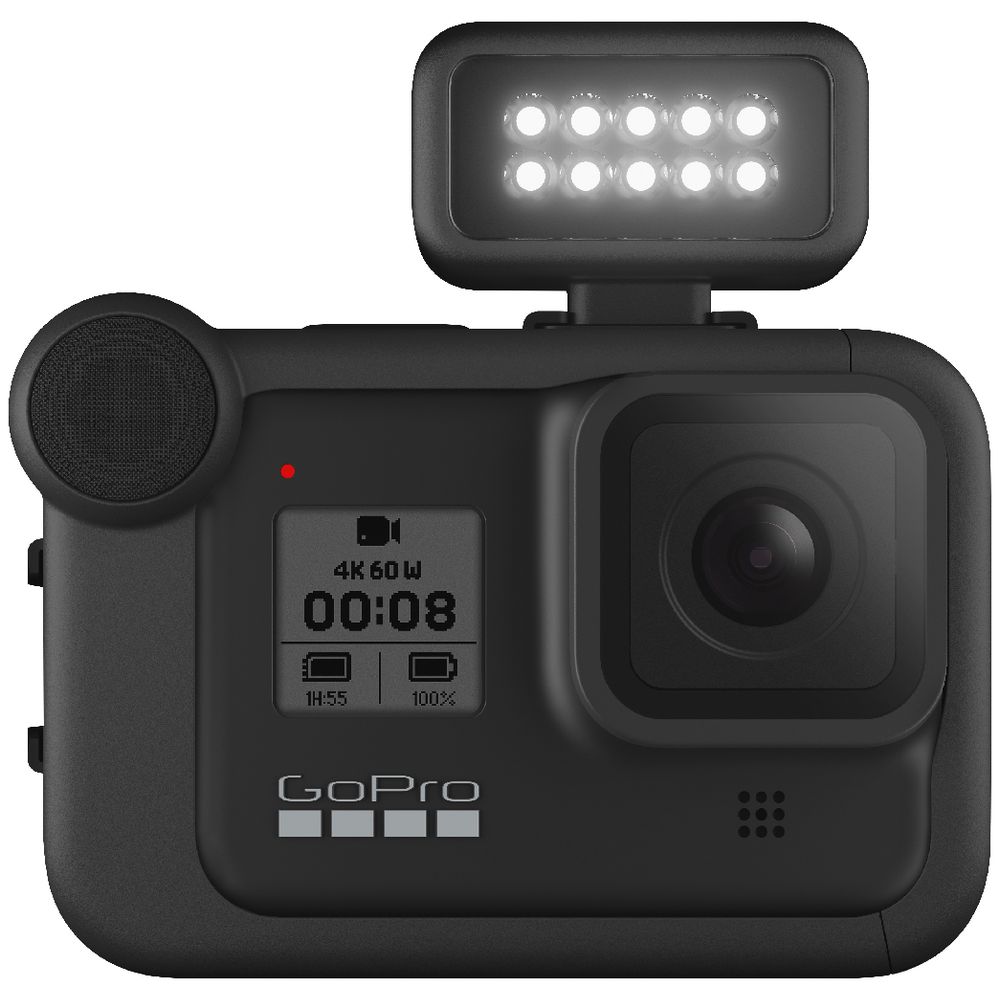
GoPro LED LightIf it is too dark, you need to add light to the scene somehow. Your best way is to use good old sunlight, but failing that, artificial light can be added to illuminate the subject or scene. GoPro themselves make a nifty little LED light you can add, and 3rd party manufacturers also have options. Check out Aputure for example.
You also need to know that light has different temperatures too, not just colours. White light that is toward the blue end of the scale is called “cold” and as the colour temperature warms up, it will go more and more red.
You probably don’t need any technicalities at this stage; if you want a lighting tutorial or two, start here (from my website).
Just remember, without adequate light, you will not get the best image no matter if it is a photo or video. And if you shoot with to much light, there is no way of removing it “in post”, so best err on the side of underexposure if anything.
Through the Lens
Righto, knowing that light is a key factor, the lens is the way this gets to the sensor, the electronic gizmo that records the image. If you ask a pro photographer what the most important part of a camera is, you’ll often here them answer “the glass”. By this they mean the lens.
Lenses on mirrorless cameras and dSLRs such as the Fujifilm X-S10 or Canon 5Ds I use have a number of important attributes that can be changed to suit different conditions and shooting styles. The two most important of these are aperture (also known as iris in video terms) and “speed”.
The aperture is a series of blades that open or close, much like the pupil of your eye, in order to adjust the amount of light entering the lens. Too much light and you get overexposure – a washed out image. Too little light and you get an underexposed image – its dark.
See? Once again, we are back to light! In photography and video there is just no escaping it!
You need a delicate balance between the amount of light available and the aperture setting to get just the right exposure you are after.
You may have heard pro photographers talk about a “fast” lens. This refers to just how wide you can get the aperture in a lens. In a very fast lens, this would range from f/1.4 to f/22. Paradoxically, the smaller the number, the more light can be let in.
Sadly, in a GoPro, you cannot change this aperture setting, it being fixed at f/2.8. This means that to adjust the amount of light reaching the sensor, you have to use alternative methods. Additionally, you are restricted on what is called “depth of field” or DOF.
You have all seen those photos where the subject in the foreground is pin sharp, but the background is blurred out? This is depth of field in action. The fashionable term “bokeh” is also a reference to depth of field.
With a GoPro however, due to the nature of the lens, you cannot successfully do these sorts of things, hence as I have said a number of times in the past, the GoPro is not the ideal camera for certain circumstances such as portrait photography.
OK, if you are restricted by a lack of aperture setting, how can you control light in other ways?
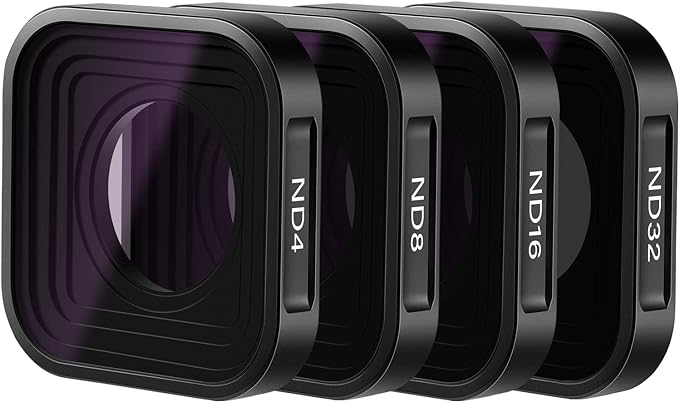 GoPro ND Filters
A lot depends on exactly you are trying to do. If you want for example, one of those images whereby the water in a waterfall appears with an almost smoky look, created by using a slow shutter speed (and therefore allowing a lot of light to hit the sensor over that period and causing over exposure), you need to use an ND filter. This will let you slow down the shutter but restrict the amount of light getting in.
Another way is to adjust the ISO setting. This is a measure of how sensitive the sensor is to light. On a bright sunny day, you might have an ISO set of 100, whereas on a cloudy day, you’d set it to 400. If you’re shooting just after the sunset, you might up this to 800 or even higher.
The third way is via the shutter speed. As I mentioned earlier shutter speed relates to how long the shutter remains open allowing light to travel to the sensor through the lens aperture. Typical examples are 1/60th or 1/125th and these numbers refer to fractions of a second.
At one extreme, say you want to get an image of a meteor shower, you might have a shutter speed of 2 seconds (with corresponding ISO values, probably at about 1200 or higher). This means the light will hit the sensor for 2 seconds, allowing you to get the meteor streak across the sky.
Alternatively, to freeze a racing car travelling at speed, you might need up to 1000th of a second or higher. A high-speed shot of a drop of water creating a crown effect perhaps 5 times that amount.
But remember, you MUST compensate for the amount of light getting in, so you don’t get an over exposed or underexposed image.
And so we come to slo-mo, or slow motion, footage in videos.
Slo-mo is actually a video shot at a high frame rate but played back at a slow frame rate. Say you shoot 10 seconds of video at 150 frames a second giving you 1500 frames of video. If you then play that back at normal TV frame rates (25 frames / second), then you have 60 seconds of video, not 10 seconds, and hence, everything will look like it is running slower.
Zoom
GoPro cameras do not have a “zoom” lens like mirrorless or dSLR cameras can have. Examples of a zoom lens on one of these might be 60 – 200mm or 75 – 150mm. You can also get “fixed” zoom lenses, more correctly called a “telephoto” lens. An example here might be a 400mm lens.
What is called “zoom” in a GoPro is in fact a bit of electronic trickery; the pixels in an image are blown up and the area of the image cropped to give an illusion of zooming in. As you’d expect, this gives you an inferior quality image accordingly.
So, if you want a subject to appear larger when using a GoPro, simply get closer to the subject. This is yet another reason GoPros are not the best camera for some things. A good example here is shooting sport from the sidelines.
Conclusion
Hopefully this article has cleared up any confusions you may have had over these basics, but please feel free to contact me if you have any specific questions!

