
One of the most common questions asked in the various drone forums is what software people use to edit their footage. Invariably the answers include a majority of DaVinci Resolve from Blackmagic Design. The reasoning is simple; it is very powerful, it’s available on both Mac and PC and finally, it’s free in its basic form.
Now when I say “basic”, that is no way to suggest that means it is not fully featured. Quite the contrary as the basic version of Resolve is more powerful than many full-blown paid versions!
Using Resolve
There is a second version of Resolve called DaVinci Resolve Studio, and this has an even more powerful set of commands and features, many of which the average person will never use.
I was thinking the other day though, wouldn’t it be cool if you could start your drone footage video with a map showing the location of your flight – something like I did the other week with the Broome video where I used Google Earth Studio to zoom into the Broome Jetty from space.
Aha! Then I thought what about overlaying your flight path on that map? Could that be achieved with DaVinci Resolve? So I did some playing and yes, you can indeed, and it’s very easy.
To keep it simple though, as a starter, here is the technique using destinations I have had over the last couple of years – Exmouth, Christmas Island and Cocos Island.
 First off, you need a map of course and I used Techsmith’s Snagit to get one from Google Earth Studio. Note you must keep the Google logo in the image to keep within Google copyright and usage rules.
Next import this into DaVinci Resolve and add it to the timeline, making the clip the length of the finished animation. I prefer to use the Edit page of Resolve for all my editing as against the Cut page.
(If you need to get DaVinci Resolve – remember it is free for Mac, PC and LINUX – you can download it here).
Bezier Curves
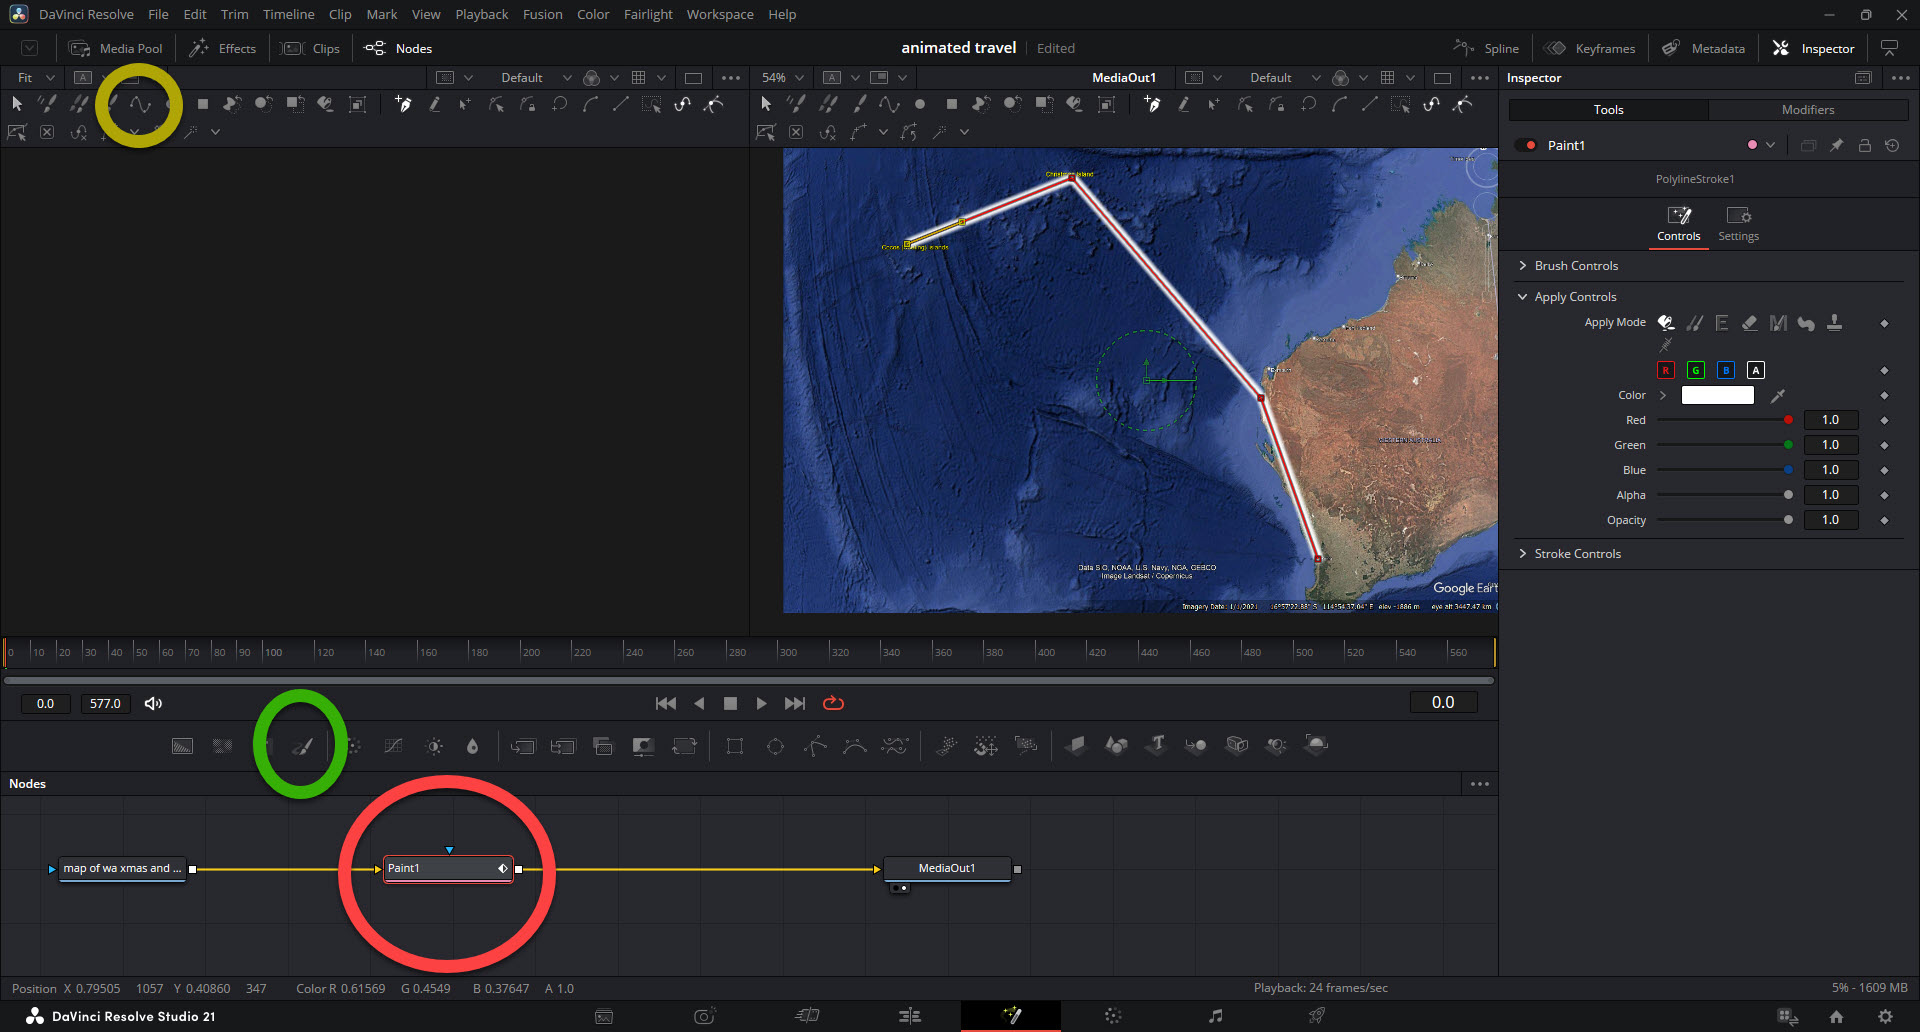
Once done, switch to the Fusion page and add a Paint Node (circled in red here) using the Paint Node button (in green). Now we want to add the path of the first flight and for this the Polyline tool is used (circled in yellow). You can now draw the path of your flight by clicking and dragging to get the exact path you are after. If you want to add curves, this will take a bit of practice if you have never used this sort of tool, called a Bezier curve, before.
I’ll go into more detail on that a bit later.
If you make a mistake, just use CTRL Z to back up the steps and start again. In the Brush Controls panel, you can change the colour of the stroke, its size and softness and also make it a dotted line by changing the spacing. In this example, the spacing is set to 1.
Key Frames
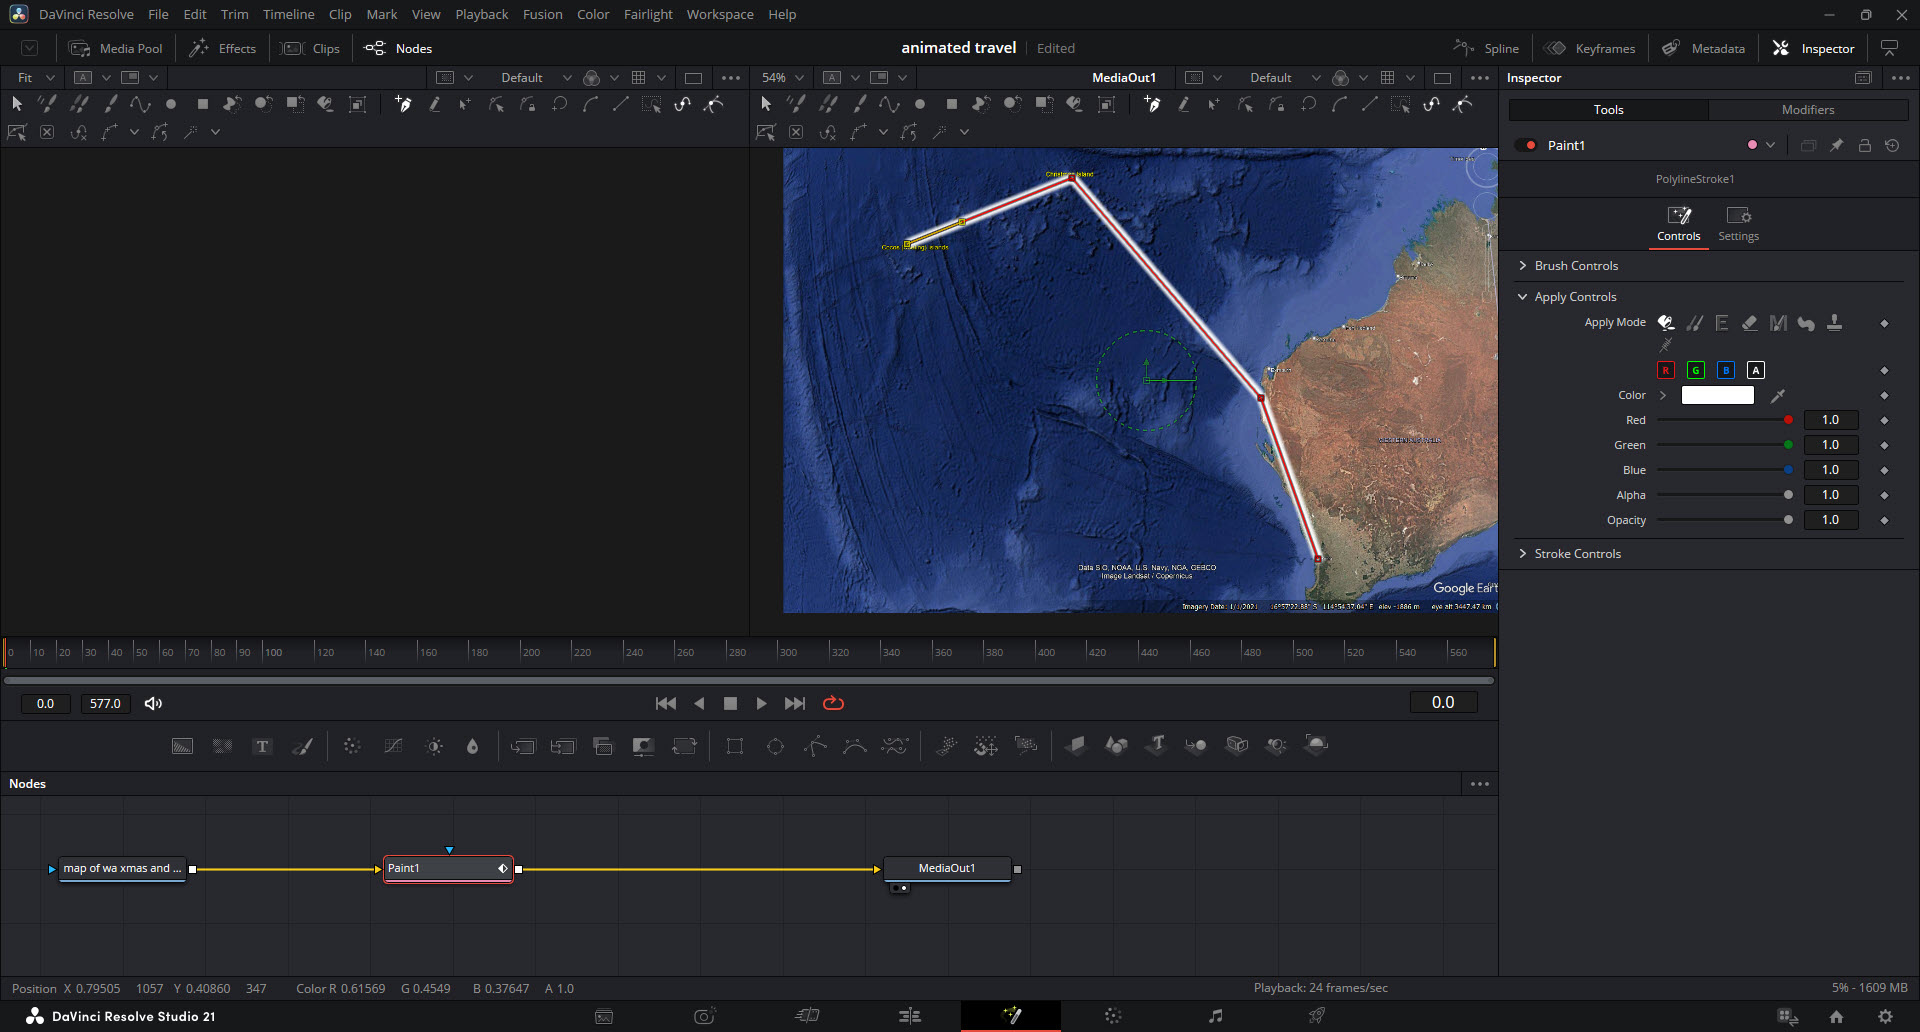
Once you have your flight path defined, make sure the play head is a position 0 on the timeline and click on the diamond shape in the Write On control to create a keyframe, following by dragging the slider back to make it 0.
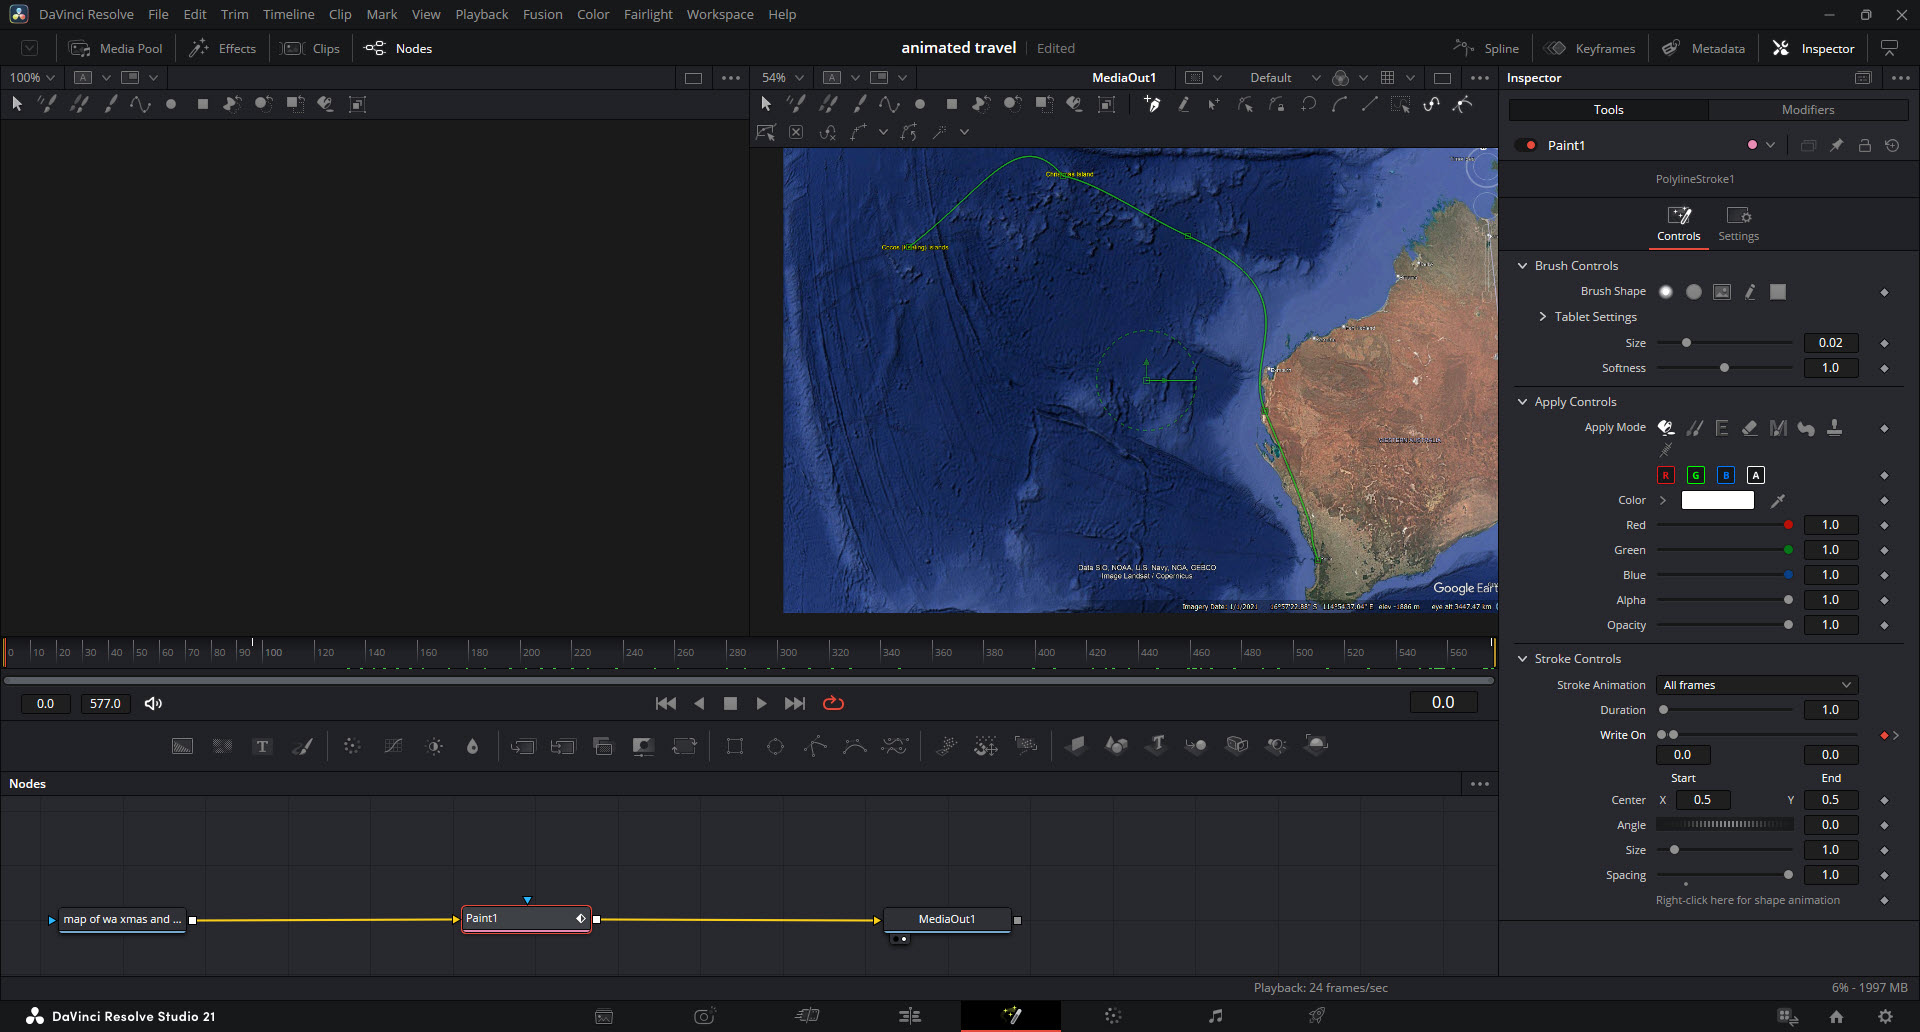 Now put the play head at the end of the clip, the last frame of the animation, click the diamond shape again to create a new keyframe, and drag the slider all the way up to 1.
If you now play the timeline, you’ll see the animation in place.
You could play around with this by duplicating the Paint node and modifying with the controls so that only the lead dot appears in this duplicate. and change this from a dot to some other shape or even an image image – say a small plane (or drone!)
Here is a second version I made using an aerial photo of my home location. In this version, I have used the handles of the Bezier curve to change the flight path from straight lines to curves. As I said, it does take a bit of practice but is well worth the effort.
Going Even Further
I have done some research, and it is possible to take the data DJI drone generates of its flight path and turn that into an animation.
To do this, you need to convert the GPS co-ordinates the drone stores of its flight int 2D co-ordinates. This is then used to create the path of the polyline in conjunction with the Write On effect I have used in this tutorial.
I also discovered there are some apps that will do the data conversion and create the paths such as QGIS and even Google Earth can visualise flight paths although I haven’t tried that as yet but it does sound interesting.