Whether you are making a short film using your smartphone or a full-on blockbuster with a cast of thousands, one thing is common – lighting. (So is audio of course but that’s another story I have covered here).
I think if most of use are honest, we would admit we know sod all about it and generally work on the basis if it “looks right”, then that will do. But if you delve into the science of the lighting process, you’ll come across terms like “colour temperature”, “RGB %”, “diffusion”, “reflection”, “gobo”, “ambient” and more. It can all be very confusing and not a little intimidating.
Now this is not intended as a tutorial in the science of lighting; I know the basics due to a background in photography, but in researching my basics of lighting tutorials (Part 1 is online here), I came across something that simply blew me away.
This is a program from German company Elixxier called Set.A.Light 3D of which there are two versions – the Basic version designed specifically for photographers and the Studio version aimed at videographers and filmmakers. There are both Mac and Windows versions with the basic version costing USD$84 and the Studio version available for USD$169. And of course there is a trial version.
These are outright purchases, will work on 3 computers simultaneously and do not require a subscription. Take a good look at these prices … and when you read and see what you get, you will understand why I was blown away. And if you download the trial and have a play, I expect you will be too…
Installation
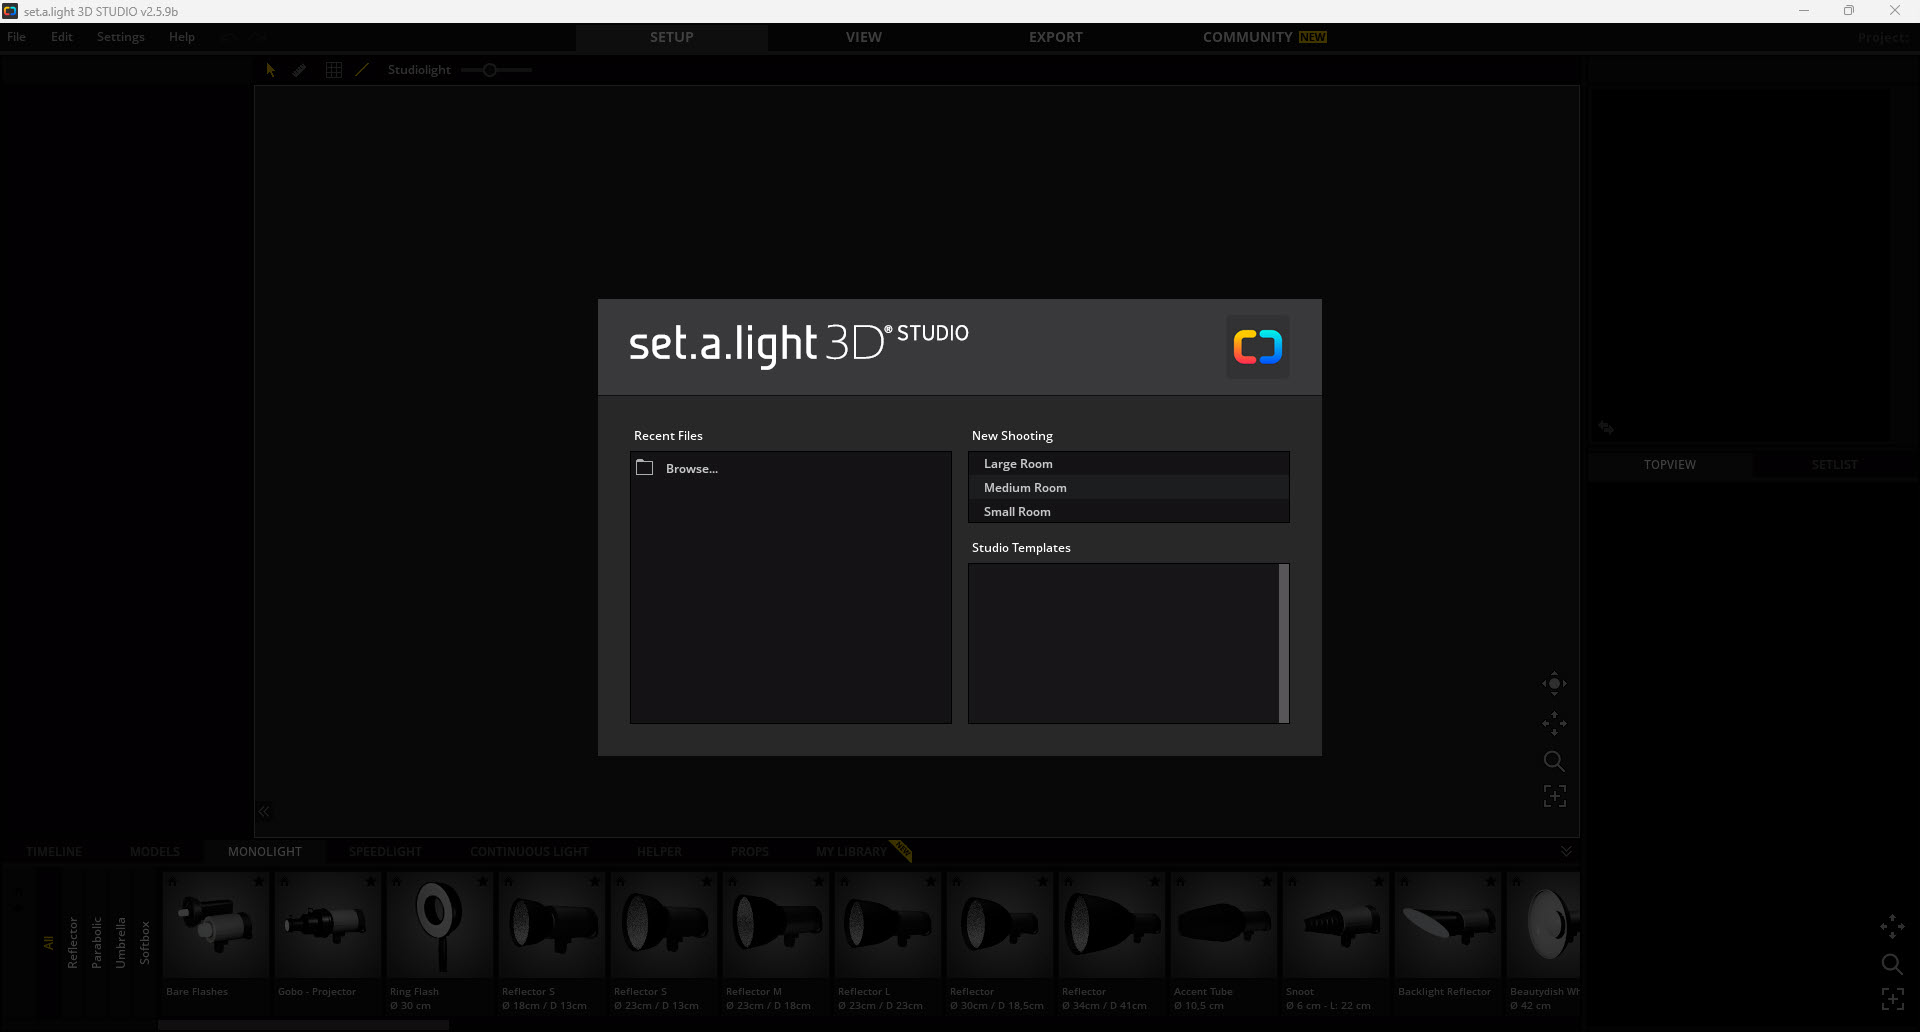
The download takes a bit of time depending on your internet connection as it is a 2GB behemoth. When you have it, a single click will install the program and once done starting the application opens a template menu that initially consists of choosing a room type as your initial lighting location, with a choice of Large Room, Medium Room or Small Room (Image 1). I chose Small Room (Image 2)
The Interface
It is important to note at this time that the user community of Set.A.Light and the company itself has created and made available 1000’s of templates you can download and use. But as I found, it is best to start simple and run through the basic tutorials before delving deeper, especially if lighting is an – ahh – dark art to you.
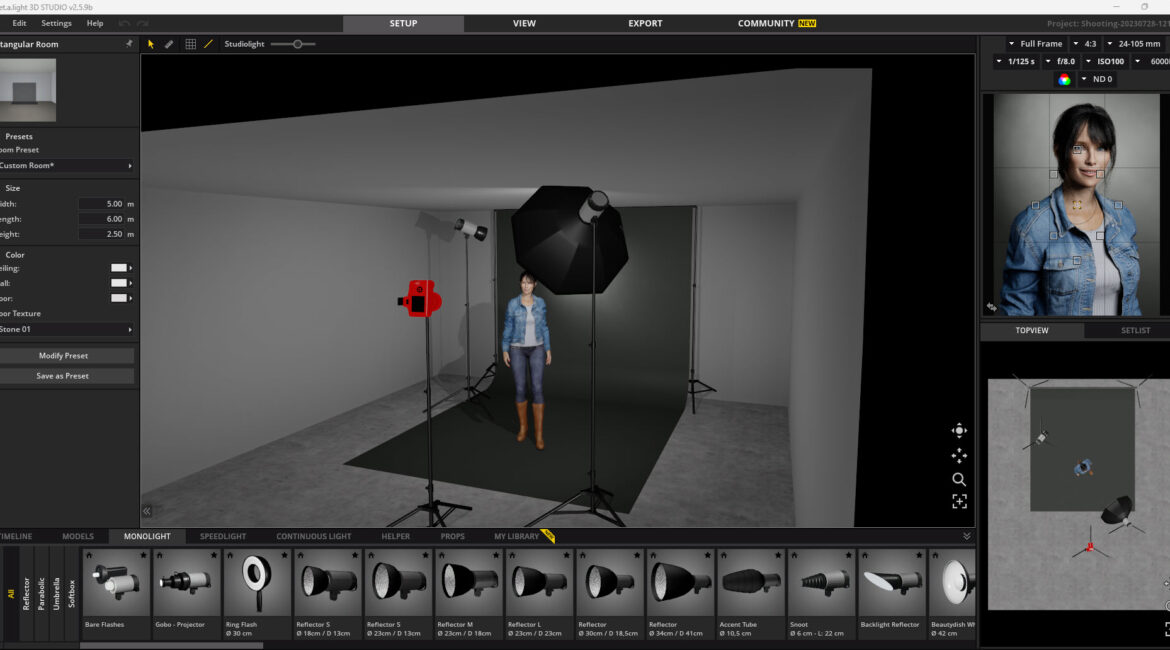
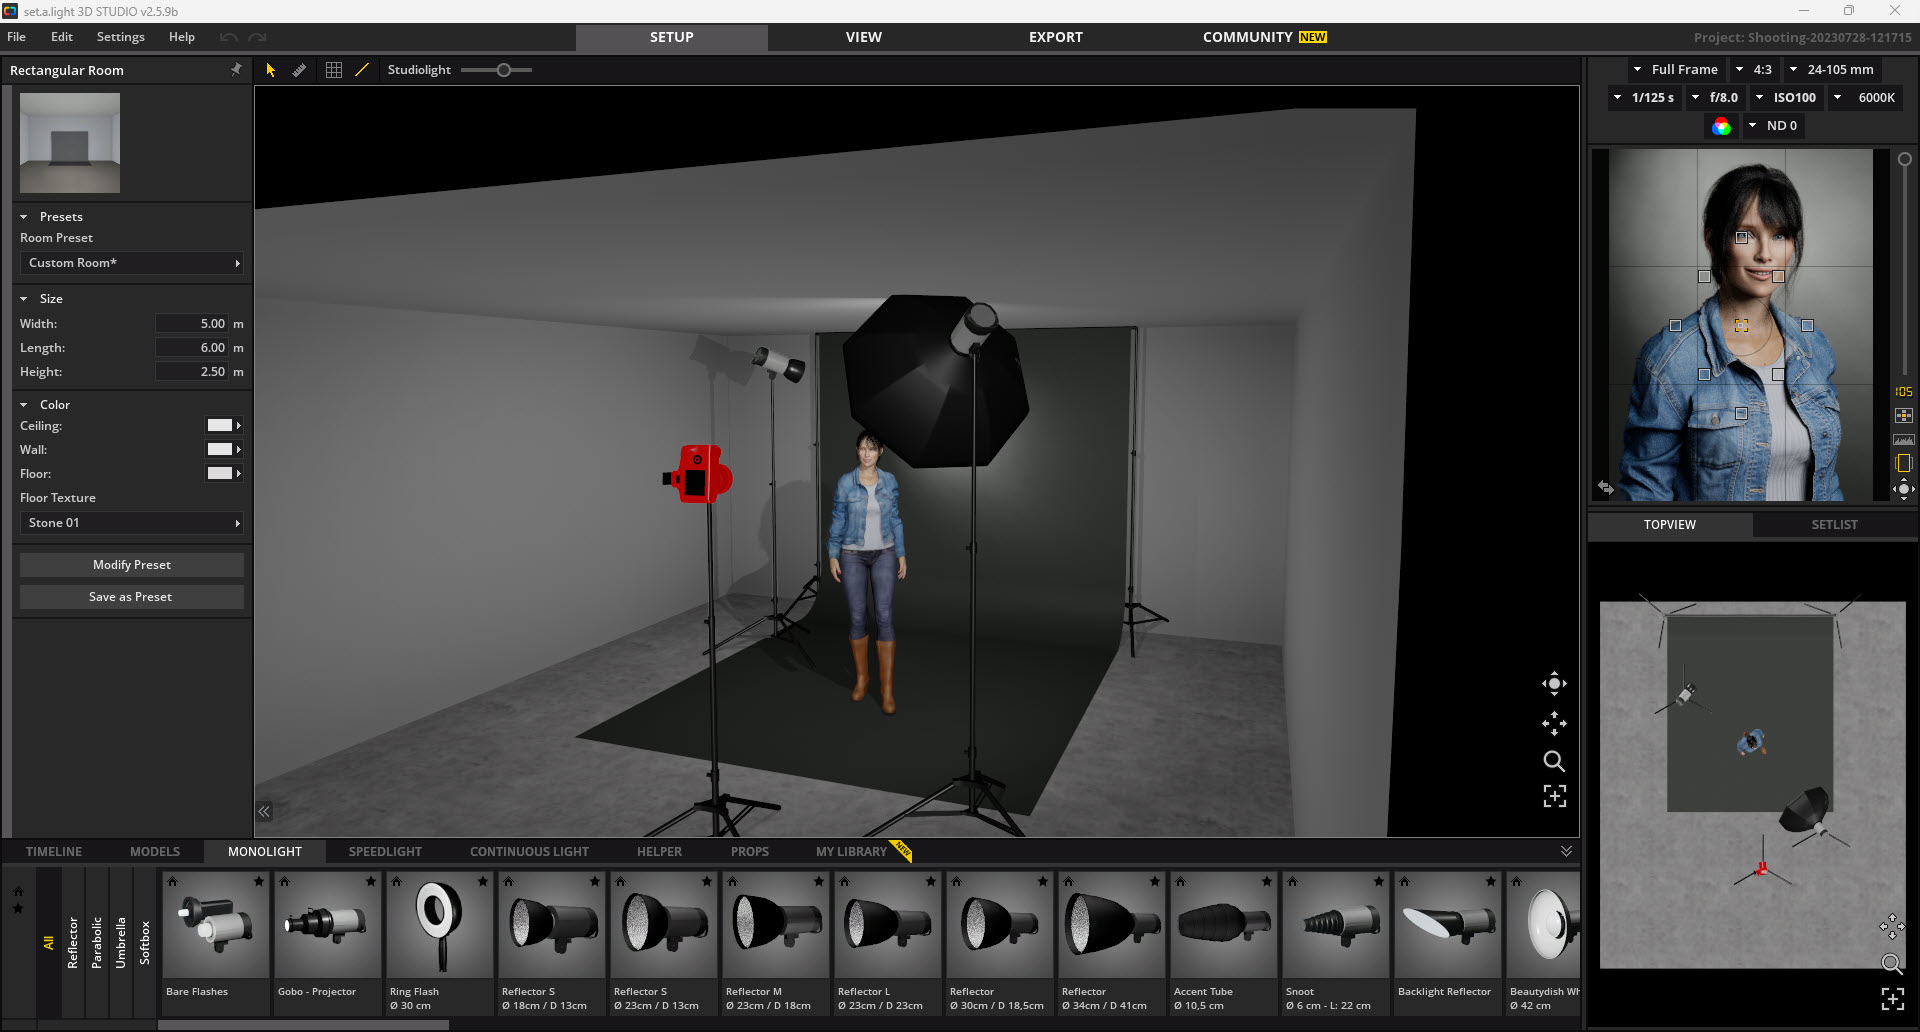
The interface that opens is the main engine room of Set.A.Light and here you can manipulate just about everything down to the nth degree. Not only is there an extensive range of lights you can choose from, but they are all totally configurable in terms of location, height colour, temperature and so on.
You can also load in other set ups available from libraries created by users and the developers as I mentioned.
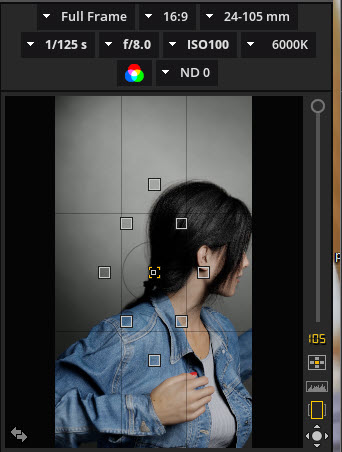
There are three views available; the main 3D view, a close up view to see how lighting affects your chosen model, and a top-down view showing lighting and other elements in the scene for precise placement.
You can navigate around the room with the mouse allowing rotate, tilt and zoom.
The Models
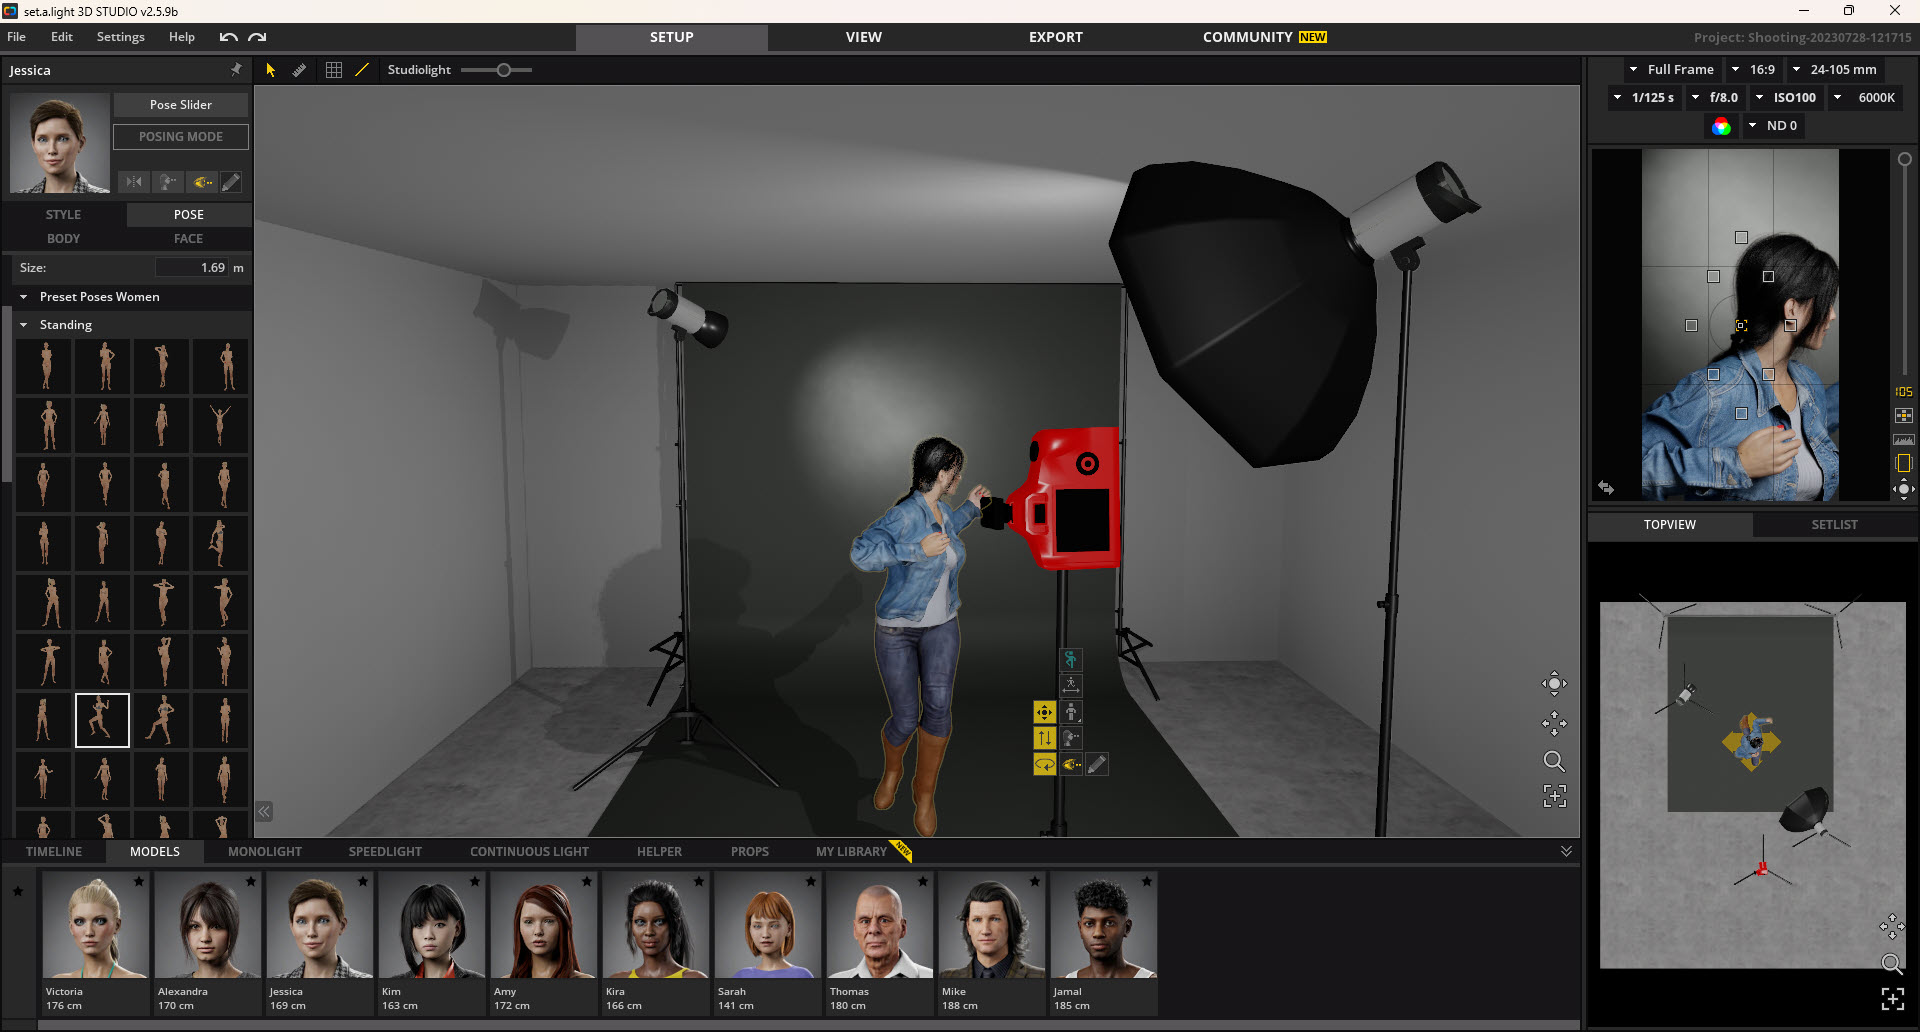
The model that is loaded is a default and as you might have guessed, there is a library there too. But these are not fixed props – oh no! When you enter the “pose” mode, a basic level lets you do initial manipulation of limbs, the head and so on, but an advanced mode narrows that down even further –down to individual fingers if you wish. A library of various poses for both men and women is available as are such things as hair, clothing, colour, body shape, faces and more.
Props area also available in their own library (and with a 3D plugin you can bring in your own from programs such as Cinema 4D which is what I use, or literally millions of props are available from 3D libraries such as Thingiverse). So extensive is the ability to manipulate a model you can have them sitting on props, lifting their leg and placing a foot on it and so on
You can add models to the set too, you are not just limited to one.
(Way back in time I remember an app for Windows called “Poser” and I suspect this might be a developed spin off from that early carnation of “people modelling”).
In simple terms, there is no limit to what you can imagine in terms of models and props. You can also customise the room and backdrops by the way. Effectively, if you can see something on the room, you can customise it.
Camera
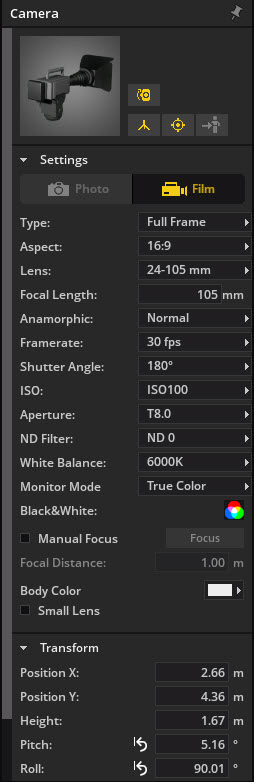
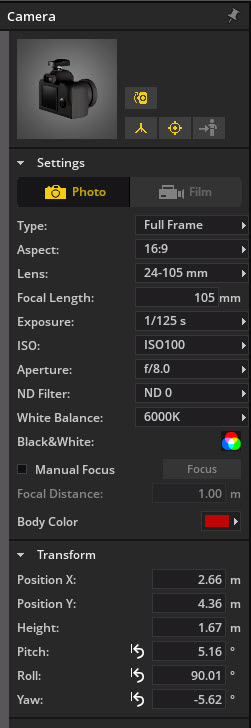
Before we get to the lights themselves, lets look at the cameras and the options available there. I have the Studio version that lets me change between photo cameras and film and as you can see from Image 4 and Image 4b, all the individual parameters of a camera are also fully adjustable. This level of customisation is common across all the objects you have access to in Set.A.Light and you also have access to a subset of controls in the model window at top right (Image 5).
Lighting
This is of course the important bit, and I would suggest a quick Google investigation of what each lighting type is designed for if you are not familiar. Whilst you can place any sort of light wherever you like in Set.A.Light, a basic knowledge never goes astray.
Of particular interest to video / film folk of course is the Continuous Light section (Image 6), and it is totally coincidental I promise that when I looked at this default library it is stocked with Aputure lighting! There is also Arri product there as well as a generic bunch of domestic and commercial lighting.
Using the tools available these can be placed where you wish in the scene and fine tuned as you’d now come to expect.
Snapshot and Export
There’s not a lot more to say about the actual placement of models, lights, props etc except that the possibilities are effectively endless in the manipulation and placement of anything you place in a scene. All that I can say after only a brief look is that I intend to do more later, and I am sure there are undiscovered hidden gems there to discover!

As you are placing lights etc, you are able to take snapshots of the scenes in order to compare different setups and allow you to choose the best one. You can either do a mini-render of a snapshot or a full render (which takes longer). This also allows you to send images as ideas to other members of a team for their input.
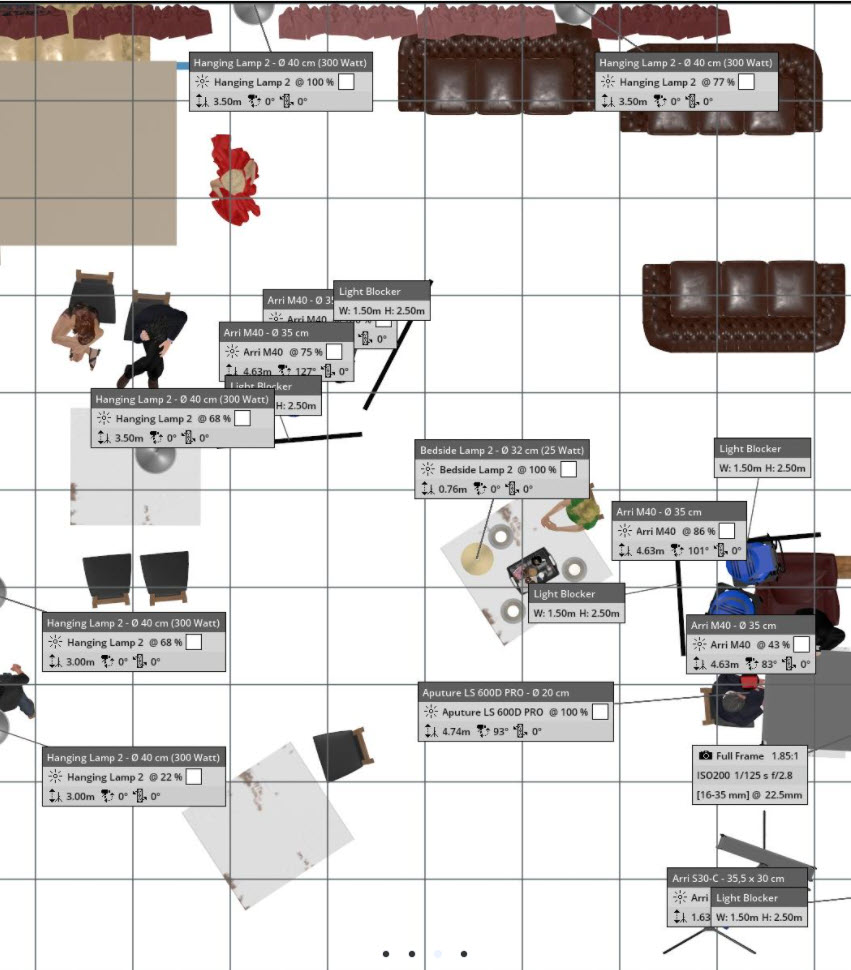
When you are happy with a layout, this can then be printed out as a PDF with all the information you need as a sort of shot list for lighting complete with placement positions, light colour, colour temperature and other technical details including camera information for use on set.
I cannot begin to imagine the knowledge and skills of the developers behind this program; as well as high end programming abilities they also must understand physics, lighting mathematics, lens geometry and maths and much more.
My hat goes off to them.
I am going to enjoy exploring Set.A.Light into as much depth as I can as it also fun to play with, and as I said at the beginning, anybody who shoots images or video / film can get some decent information for their next project thus making it a much better overall production.
Take a look and download it from https://www.elixxier.com/en/video-tutorials/ where there is also a bunch of easy-to-follow video tutorials to get you going.
Other stories You Might Like...
 Review: Zhiyun MOLUS X100 Lighting System
 New to Lighting? This Explains All (Part 1 of 3)
 New to Lighting: A Tutorial (Part 2)
 New! Zhiyun Molus G60 COB Portable Light Reviewed. Simple and Brilliant.
 New MOLUS G200 and Fiveray V60 Lighting
 Review: DaVinci Resolve Speed Editor
 Review: DJI RS3 Mini (plus a bit more).
 Maxon’s ‘Spring Release’ of new products includes Cinema 4D, Redshift, Red Giant, ZBrush, and Forger