Those of who started at the original coal face of digital video editing may remember the tedious art of manual rotoscoping.
I remember a tutorial for a program from a mob called Puffin Software that allowed this, but you had to work frame by frame – in this case removing a seagull flying past a marker buoy with a ship in the background as I recall. I can’t for the life of me remember the name of the package (I think it was snapped up by BorisFX) but a price tag of over AUD$1000 rings a bell – a lot of money back in 1998.
Over time, with memory becoming cheaper and computer processors getting faster and faster, thankfully things have improved dramatically.
Today you can buy ProDAD Hide, which was originally called Erazr, for a fraction of that (on subscription admittedly although you can get the full version). If you have a shoot that has a major error in it where something needs removing for example, this is a small price to pay for the labour saving it offers.
In order to better explain this, here is a sample of what can be achieved in minutes not hours. The example is pretty straight forward in that I wanted to remove a pair of seagulls from a drone video, but it gives you a fair idea of how the application works and how easy it is to use.
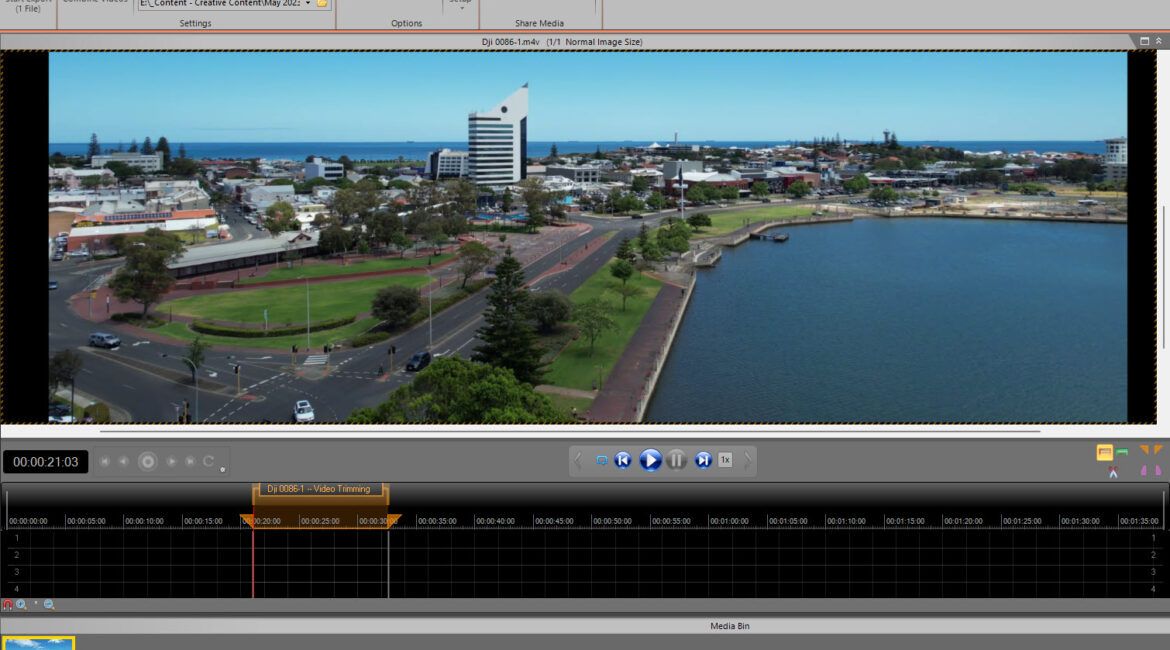
The first step is to load the video into Hide and then set in and out points if required to create a working area of the clip you want to correct.
(As I quickly discovered, you need to create a working area regardless or the whole thing does not work. In other words, if you have a clip and only extract the portion you need using your video editing program, after loading into Hide you still need to set a Working Area).
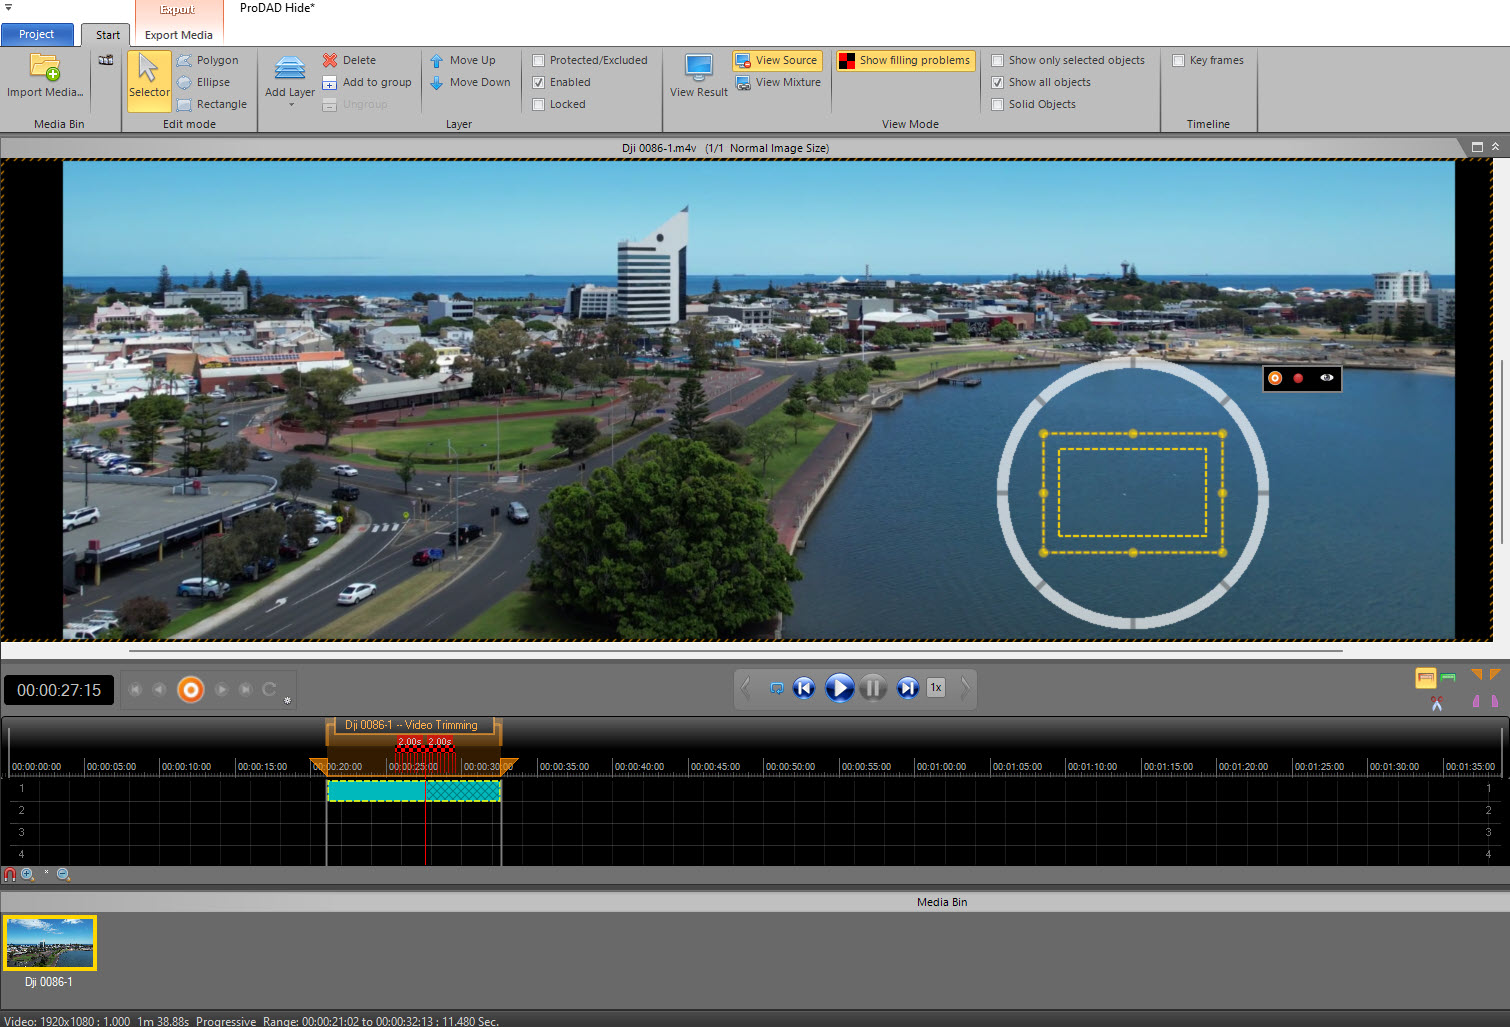
The second step is to choose (mask) the area to be removed and then, as you scrub through the clip, correct the mask’s position You need to make sure your object(s) stay within the mask’s boundary at all times. The mask boundaries can be manipulated as you go, including increasing or decreasing its size and rotation as necessary.
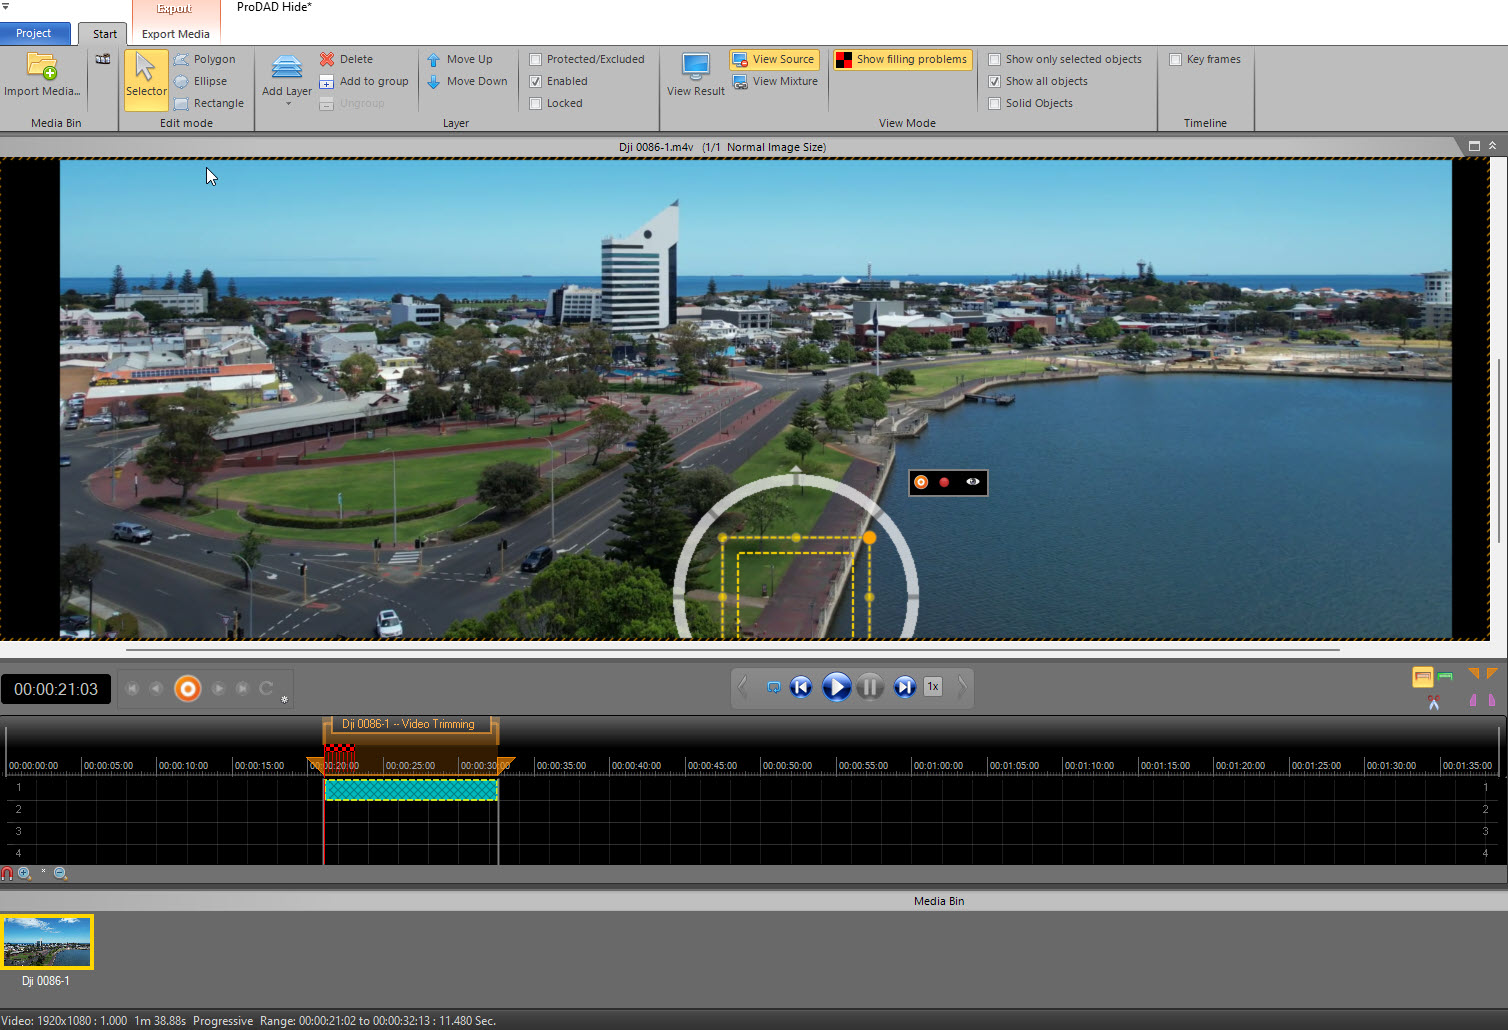
For small objects you can also set the size of the grid the processing works on inside the mask for better results.
Additionally, there is an automatic tracker you can use and then later go back and fine tune the masking it creates.
Once you have the masking and tracking correctly in place, clicking the ‘Show Results’ button starts the processing and makes a version ready for export.
Easy as that in its basic use.
One thing I did notice when exporting the file is that it is best to send the corrected file to a new folder, otherwise you’ll overwrite the original file. This seems a bit of an oversight that there is no option to save as a different file name and I am checking ProDAD on this unless I have missed the bleeding obvious…
Another thing I noticed is that on my original test file, one of wind surfers at Margaret River in WA’s southwest, whilst I could remove a specific surfer, the resultant file showed a lot of artifacts in the area the surfer would normally have appeared. A quick 10 second think as to why this would be giving the obvious answer; programs like this replace the removed image with a previous background, but of course with an ever moving ocean, it will NEVER been the same and therefore will look odd.
Finally, prior to processing to get the final video, you also have available access to various effects including fading and exposure. An important setting also here is ‘Filling’ and this relates to my ocean comment above.
To quote the manual, “As Hide examines the material in a defined area and checks what was previously at the point where the masked object is now or what will be there afterwards. And from this information, the area of the mask is then filled. The set area is marked red in the timeline. Under “Method” you can select between “Pixel tracking (GPU)”, “Stamp”, Colour filling “and” Edge fill-in “. With the first two, the image is filled with actual image content. Whereby “Pixel tracking (GPU)” gave the best result in my tests. But it is also slowest in the calculation.”
I only gave ProDAD a very quick test in reality but am happy with the results I got. Although this example wasn’t too difficult for the program to fix, the tutorials and manual supplied with the program take you through much more complex possibilities.
A bit more time spent – which no doubt will happen as I can see many opportunities for using Hide in the future – will certainly see me sharpen my skills and make Hide a very valuable tool in my arsenal of editing software.
You can get a trial version so you can unleash Hide on any particularly annoying objects in your videos; give it a try, download here.
Postscript: After writing this and posting the video, it seems YouTube and processing may have crushed it to the point you cannot see the seagulls in the original video. I’ll try and post an alternative sample shortly.