I’m just a big kid at heart. That probably why I still have a Meccano set, like making complex Lego models (of race cars particularly), love Dr Who (most of it anyway) and gadgets.
So, I think I can be forgiven for when seeing a $12.99 “Grow Your Own Crystals” chemistry set in Coles this week, I couldn’t resist buying it.
As a kid in Harvey High School here in the SW of Western Australia, I loved chemistry, and indeed, became the “Science Monitor” for year 3-1 (now known as year 10), and had a special affection for copper sulphate and potassium permanganate. Oh and magnesium strips (but I’ll stop there as I might incriminate myself). I have very fond memories of growing crystals in test tubes and special dishes.
When I got the kit home and open, after reading the instructions that the growth time would be in the realm of 1-2 days, it suddenly dawned on me this would be a great experiment in timelapse for a GoPro 9 (my 10 and 11 are on Blackmagic Design ATEM Mini Pro duties).
So here is how I set it up.
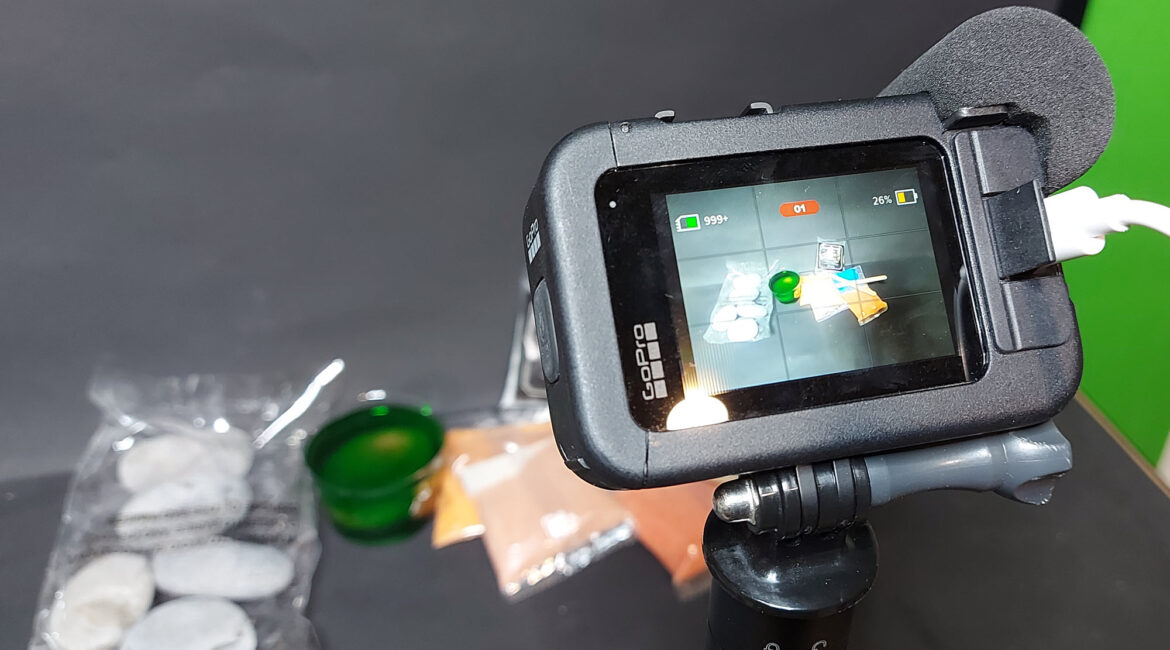
It figured using a Media Mod be the best way, as I could a) add constant power via a USB charger through the USB port. The battery could thus be removed and minimise the heat factor and b) if I wished, run an HDMI cable to the Blackmagic Design ATEM Mini Pro allowing me to make the experiment part of a live stream if the opportunity arose. Audio was not a factor.
I initially selected a GoPro tripod, but quickly cancelled that concept as they really are too flimsy and susceptible to vibration. Instead I used a small Zhiyun unit with an extender I have that came with the Molus G60 Lighting Combo kit.
Setting the camera itself up for timelapse is easy; simply swipe left on the rear screen until you see the Timelapse option and press it. Then press on the Timelapse button that appears at the bottom of the screen and set it to the type you are after. I chose a Photo mode and every 15 minutes meaning the resolution will be in 4K and the image taken every 60 minutes.
Don’t forget to also set the power options to Never Turn Off.
Then I mounted the camera on the tripod, framed the dish containing the crystal solution and left it after pressing the shutter button (and yes, I did do a brief test first to make sure it was all working, as well as putting a new Verbatim 64GB SD card in that I formatted in the camera).
You might want to consider lighting options too. I have a desk lamp over the dish with an LED ring light in it, but for future experiments like this, I might use the Zhiyun Fiveray with a USB charger connected so I can play with different light colours and temperature.
Once the crystals have finished, I’ll turn the resultant images into a movie and post it here.