
Over the years, I have invested a LOT of time in 360° cameras and associated software, and I think I can safely say I now pretty much understand all of the nuances and quirks there are to understand, and in some cases jump over.
It is also fair to say that any 360° capable camera is only as good as the software to edit the footage shot, and it is an entirely different discipline to standard linear editing. Suffice to say if the concept of key frames baffles you, don’t bother. It’s as simple as that.
Why?
Because, as I have stated numerous times, when shooting in 360°, you are effectively shooting with an infinite number of cameras at the same time, and the way you switch the scenes from one “camera” (read “point of view”) is via keyframing.
Simply, in 360° editing, a keyframe sets the point of view of the camera to a specific position and will stay there until a new keyframe is set, at which point you have the choice of a hard cut to the new POV or a lineal gradual change to it over time. That’s a bit of a simplification but you get the idea.
I mention all this as yesterday, the new Insta360 X6 camera turned up and this afternoon, while walking DougietheDoggy I took a few shots to get a feel for it and the Insta360 Studio software.
As the X6 saves its files in a proprietary format, you need to learn Insta360 Studio, or you simply have a pile of footage you cannot do much with. The company is not alone in this by the way as DJI also uses a proprietary format for its OSMO 360 Mk II as does GoPro with the Max – although there is a DaVinci Resolve plugin that can assist in that area for the GoPro and can act as an intermediary for other 360° footage saved as rectinlinear.
Precursor
I am writing this as a precursor to a more in-depth review of Insta360 Studio; I simply wanted to check how fast a non-user could go from no to go with their first 360° footage from an X6 – and I am pleasantly surprised.
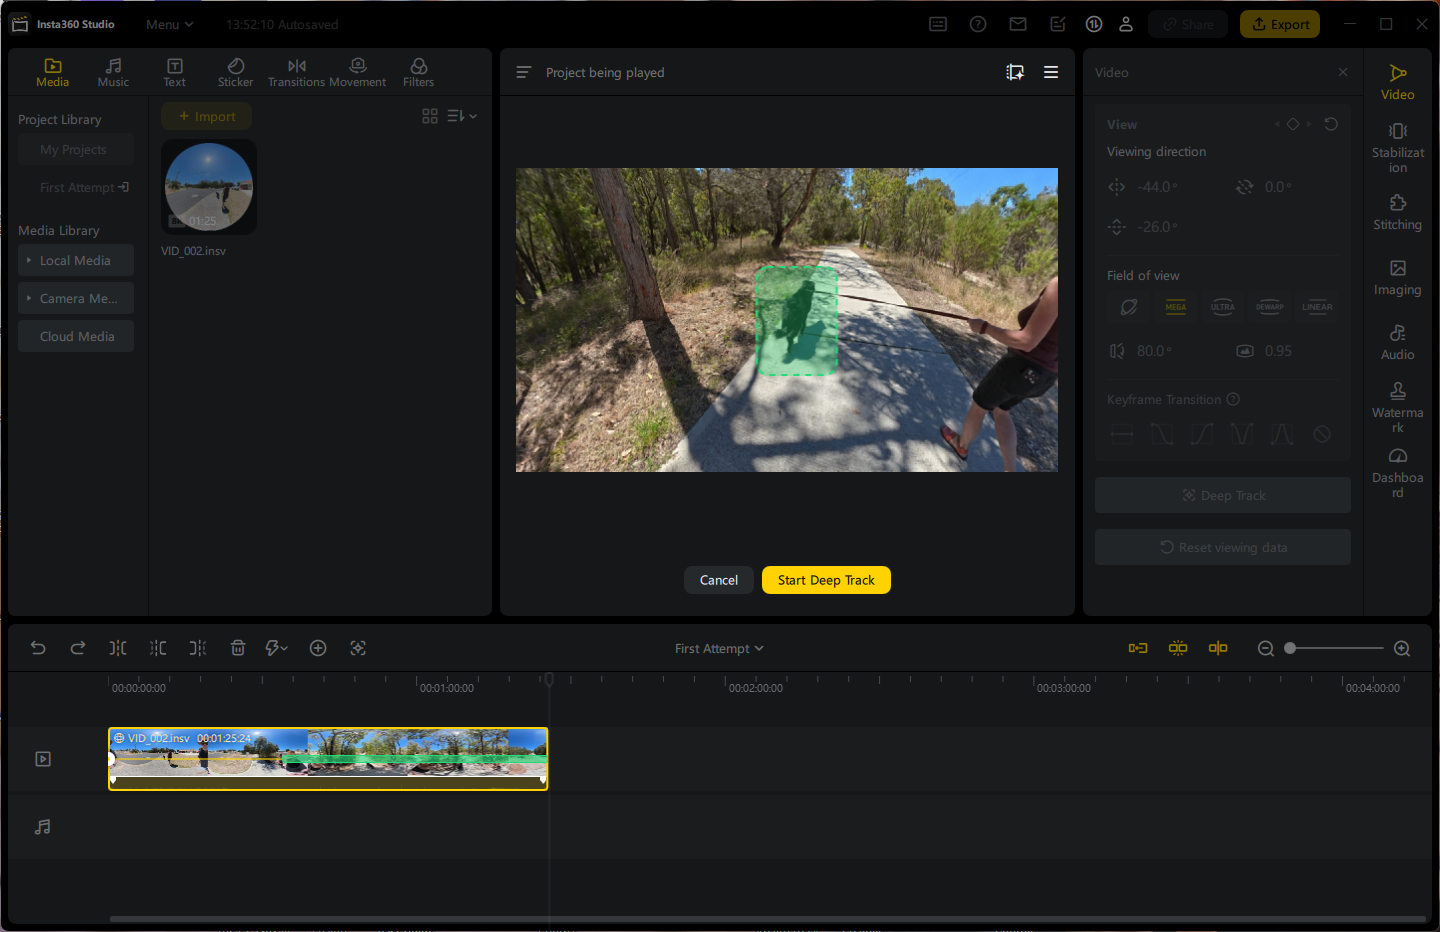
At the start, a rudimentary on screen step-by-step tutorial guides you through the very basics from loading the footage to adding a keyframe and even applying the -so far – very accurate tracking system , you select an object such as a person, or in this case DougietheDoggy to keep them automatically in centre of frame.
Once you have the nuts and bolts sorted, you can then at you leisure, explore all the other options available to you such as Field of View, Keyframe Transitions, Aspect Ratios and lots of other goodies to play with and use to enhance your footage.
Conclusion
The 360 camera offerings available from GoPro, Insta360 and DJI are the only real players on the block at the moment and while the DJI and GoPro options are roughly the same price at around $849, the Insta360 is substantially more expensive at present anyway at $1049.
Its also worth remembering the Max II is now over 12 month old technology which in camera terms is a lifetime.
Is the Insta360 X6 worth the $200 the extra expense?
I’ll let you know categorically over the next few days or so. Suffice to say at this point, I am suitably impressed with what I have seen, with the exception being the setup and registration procedure in conjunction with the Android app is in my opinion, messy. I’ll let you know of the ways around the stumbling blocks there too.
What also has to be measured is not just the camera. As in 360° shooting, you are tied to the software pretty much, there is no point in having a brilliant camera and carp software, and vice versa, so this has to come into the overall equation.