
In the previous two articles on the new RØDECaster Video, I primarily covered the various buttons and ports controlling cameras and audio devices.
This section relates to the functionality of the RØDECaster Video beyond these, which let’s face, are in the long run, just letting the RØDECaster Video be a basic video / audio switching device, when it is far, far more than this.
To take advantage of the higher end functions, you need access to the RØDECaster app on your PC or Mac that allows it to communicate with the RØDECaster Video (or RØDECaster Pro II) and vice versa.
The connection between the two is either via cabled Ethernet or Wi-fi. Despite the obvious attraction of a cableless office, for device-to-device communication such as this, especially where video might be involved, I tend to prefer wired Ethernet. In fact, the only devices I have on my network that are not wired are my Flashforge 3D printer and an Epson printer which are both in separate rooms.
But certainly, such things as the RØDECaster Video, RØDECaster Pro II, Blackmagic Design Speed Editor, Loupedeck CT console and Blackmagic Design ATEM Mini Pro are all hard wired.
Scene Builder
The following all come under the umbrella title of the “Scene Builder” in the RØDECaster app an indeed, the RØDECaster Video itself. Firstly though, in this Part 3 I’ll run through the various controls available to you and in the next, describe in more depth the process of creating scenes. In Part 4 I’ll then run through the actual process of recording and streaming.
When the app is loaded, you’ll notice that the bottom-centre of your Scene Builder is laid out just like your RØDECaster Video’s interface. Every action you take inside the Scene Builder is immediately reflected live on your RØDECaster Video, even over Wi-Fi, which means you can remotely control your RØDECaster Video using the buttons in the app which effectively mimic those on the physical unit.
Existing Blackmagic Design ATEM software users will be immediately familiar with this approach.
At the centre of the Scene Builder is a live video feed from your RØDECaster Video. If you are in Instant mode, this will be the Program feed, while in Studio mode it is the Preview feed. You can tell which feed it is by checking for either PGM or PVW at the top right of the display.
Anything you now create using the various options as described below, can be saved as a “show” (this is the same principle as used in the RØDECaster Pro II) and shows can be recalled at any time.
You CAN build scenes using the RØDECaster Video console by itself, that is, without using the RØDECaster app, by having briefly had a look at doing this, whilst it is there as an option at a pinch, seriously, get the app and make your life so much easier!
You will thank me later I promise.
MicroSD Card
As mentioned, with the Blackmagic Design ATEM Mini Pro, the files I use for lower 3rds, intro graphics, stings and bugs etc are all stored in the Media Player, but the RØDECaster Video is more flexible than this by using a microSD card, and further, increases on the graphic’s limitation of JPG or PNG (for transparency) by allowing video, audio and graphics.
Any of the images can be recalled via the Media button and Scene buttons labelled A-G on the RØDECaster Video. But first, you need to get the image on the microSD assigned to the relevant buttons.
This is best explained by way of example.
Media Button
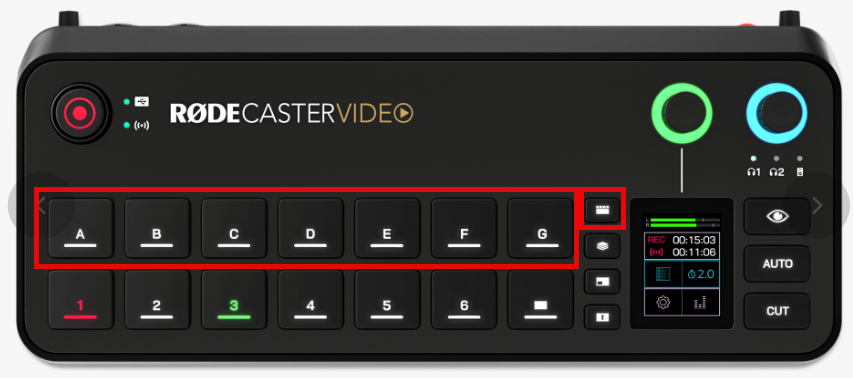
Let’s say I want to assign my graphic logo to button A. First you need to have the RØDECaster app loaded, and the RØDECaster Video device selected. To add an element – video, graphic or sound – you click the Scene Builder option.
Here I made what appears to be my first mistake by the way. I initially copied all the files I wanted onto the SD card from the computer and inserted that into the RØDECaster Video, but the Media Library, despite showing there was space used on the card didn’t actually show any images.
It appears (and I am awaiting confirmation from RØDE on this) that you need to have the blank SD card in the RØDECaster Video and then use the navigation controls in the Media Library to go to the appropriate folders on the PC and select the files that way for copying.
My second error was in allowing files bigger than the Media Library allows to be selected. It is actually in the documentation that graphics files larger than1920 x 1080 are not allowed, and video files MUST be 1920-x 1080.
Once you have your files loaded, to assign a file to a button is as simple as clicking the Media button so it turns purple and then dragging the file you want on to one of the media buttons (A-G).
In this example, I have dragged the graphics logo onto button A and by clicking the “eye” button you see it displayed. If you are using a reviewing external monitor, this will also display there at this time.
Once your Media buttons have media assigned to them, you can adjust certain settings, such as whether a video plays once or loops, and the start, end and fade times for audio files. In effect, a graphic assigned to a button can be treated as another camera. You can play an imgae once, tell it to loop or by using the RØDECaster app in conjunction with the RØDECaster Video you have access to unlimited graphics that can be swapped in and out as required.
Overlays
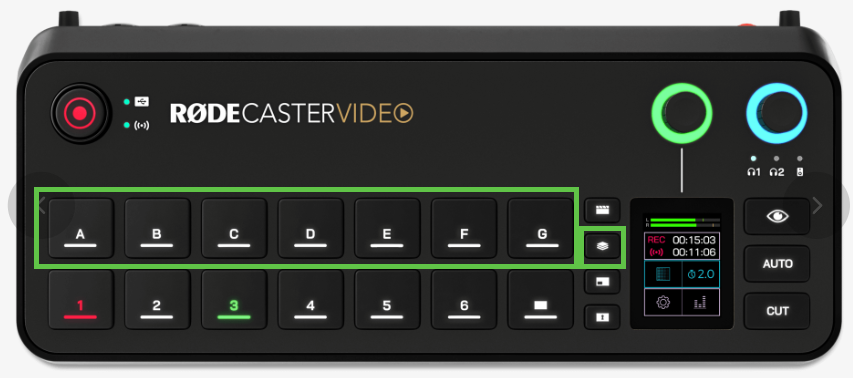
If your graphics have transparency (they need to be PNG files and created with transparency using something like Adobe Photoshop or Techsmith SNAGIT). They can act as overlays. A perfect example is a lower 3rd as seen here already loaded into Button B.
Instead of the Media button being purple, the Overlay button is now selected and it is cyan. You’ll also notice in the top right the options to set the Fade time and adjust the size and position of the overlay.
Scene Audio
Scene Audio allows you to automatically mute any of your audio channels when switching to an input, scene or media button. To create Scene Audio is a simple operation by selecting the scene or button it is to apply to and toggling off which channels you want muted.
Multisource Button
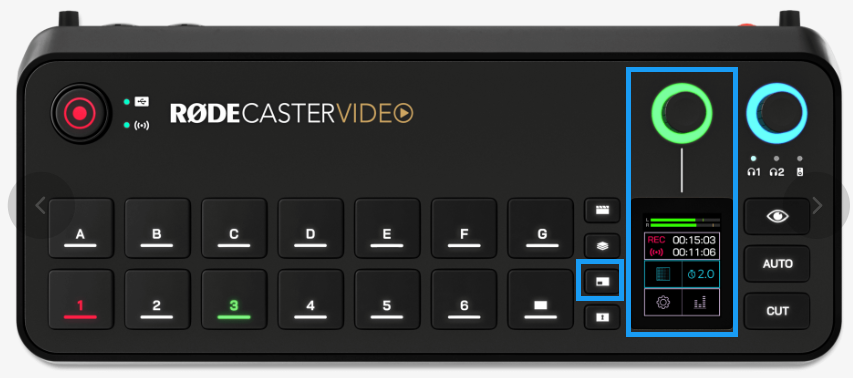
When creating such things as tutorials, live streaming with a guest and so on, it is often useful to have the ability to utilise a picture-in-picture effect or a split screen configuration and this si where the Multisource button comes in.
Even better, you have the option top create them on the fly, or alternatively, you can set up the parameters beforehand and save them to a scene button for later recall.
There are a wide selection of presets available to you making life even easier.
Keying Button
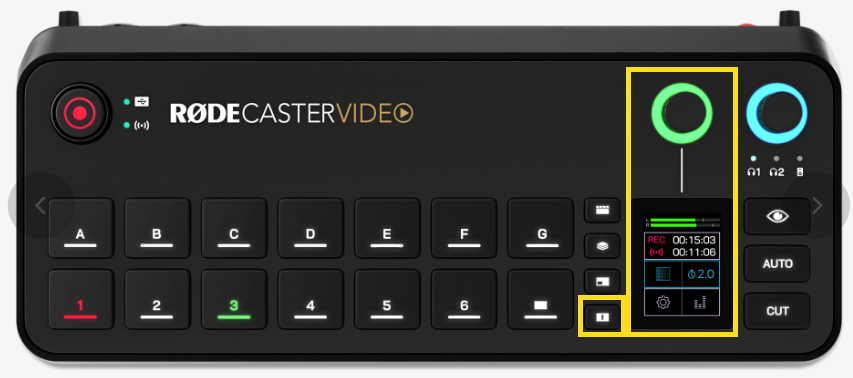
This is one area I really applaud RØDE’s engineers as they have made the usage of this option a snap. With the Blackmagic Design ATEM Mini Pro, it takes a bit of learning and trial and error to set this up.
I’m talking about Chromakeying here.
With the RØDECaster Video you simply press the Input button you wish to apply the key to and then press the Keying button. Now, you can use the encoder to select either green or blue screen and press another input or media button to select it as the replacement background. To select no background (transparent), you simply tap the screen instead of pressing a button and this allows you to use this keyed input in scenes.
Inspect Button
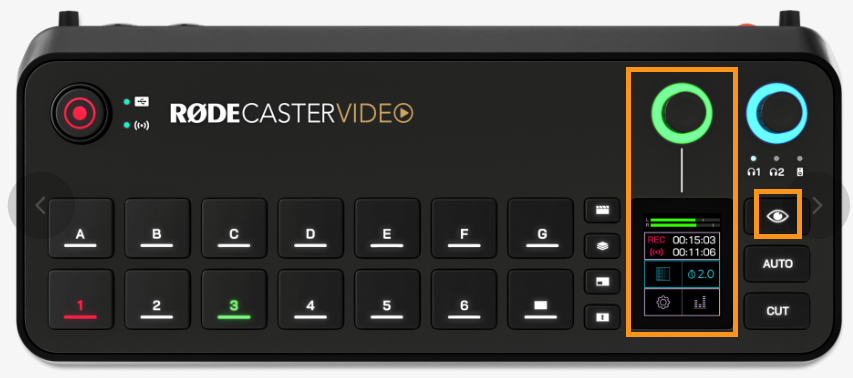
An important button to understand is the Inspect button which lets you view information about and adjust settings of scenes, media or overlays without them needing to go either live or by cueing them.
Depending on the mode (input, scene, media / overlay) each of these can be checked as to such things as resolution, frame rate or colour space, delete or move scenes and preview or delete media or overlays.
Cut and Auto Button
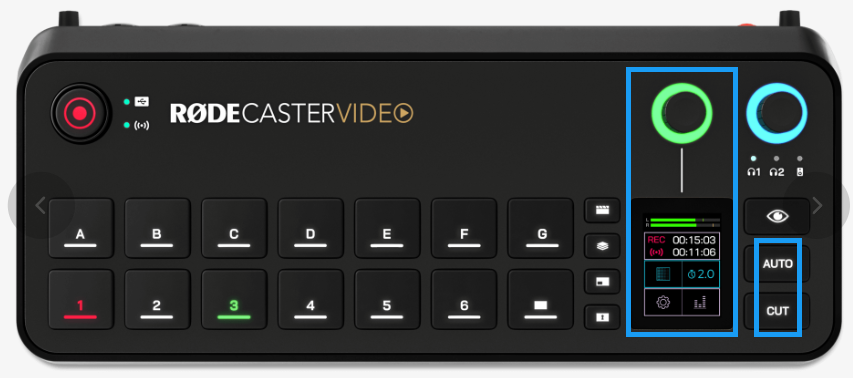
These are pretty explanatory and allow you to either instantly switch between feeds (Cut) or switch between your input, media or scenes using your transition settings, or between the Preview and Program feeds when in Studio mode (Auto).
When using Auto, transition timings and type can be adjusted, plus you can fade, dip or wipe with various other settings available depending on which is chosen.
Record and Storage /Network Buttons
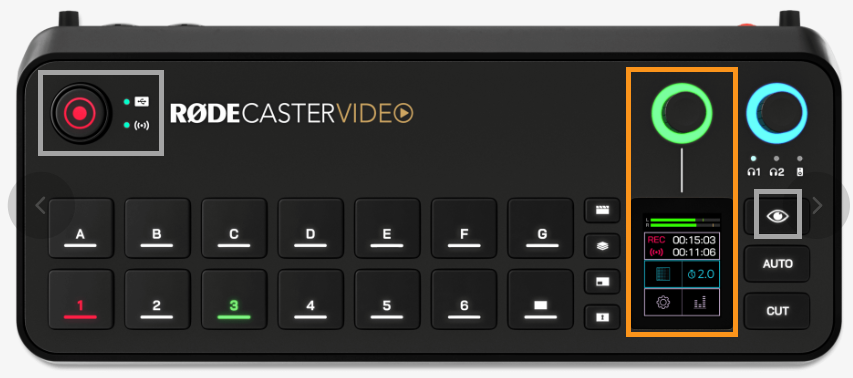
These are pretty self evident. Record turns on or off recording and LEDs give different colours depending on whether storage is available.
The network indicator will light green when ready stream and red when actually streaming. If it remains unlit, the RØDECaster Video is telling you that either you haven’t set up a stream profile or there is no connection.
Frame rates can be set by the operator when either streaming or recording from 23.98 fps through to 60 fps.
If there is any audio delay, this can also be compensated for.
As I mentioned earlier, in the next instalment, I’ll go through putting all this together to setup a stream / recording session.
You can read Part 1 of the review here and Part 2 here.
For more info from RØDE on the RØDECaster Video click here